
At its core, LibreTranslate is a self-hosted translation API. In simple terms: instead of using online tools like Google Translate, I run my own translation engine locally — on my PC or server. No internet dependency, no usage caps, no surprises.
🚀 Why I chose LibreTranslate
There are three key reasons why this setup makes a lot of sense:
🌐 Works offline
Once everything is installed, it runs entirely locally. I can translate text without any internet connection, which is perfect for:
- internal tools
- sensitive data
- unstable network environments
💰 No API limits or costs
Unlike cloud services, there are:
- no quotas
- no billing
- no “you exceeded your monthly usage”
I can send as many requests as I want, which is a big deal if you're building something automated.
🔐 Full privacy
This one is huge.
With LibreTranslate:
- my data never leaves my machine
- no external APIs
- no tracking
For any project involving user data or internal content, that’s a massive advantage.
⚔️ LibreTranslate vs Google Translate / DeepL
Let’s be honest — tools like Google Translate and DeepL are extremely powerful.
But they come with trade-offs:
| Feature | LibreTranslate | Google Translate / DeepL |
|---|---|---|
| Internet required | ❌ No | ✅ Yes |
| Privacy | 🔐 Full control | ❌ Data leaves your system |
| API limits | ❌ None | 💰 Paid / limited |
| Setup | ⚙️ Requires install | ✅ Ready to use |
| Translation quality | 👍 Good | 🔥 Excellent |
🧩 What I Actually Use LibreTranslate For
When I first set up LibreTranslate, I didn’t do it “just to have a translator.”
I needed something fast, scalable, and cheap (ideally free) for real production use.
And that’s exactly where LibreTranslate shines.
🌍 Real-time translations in web applications
The most obvious use case is integrating translation directly into web apps.
Instead of relying on external APIs, I can:
- translate user-generated content
- localize UI dynamically
- build multilingual platforms
All locally, with zero external dependencies.
🧾 Automatic content translation (CMS, databases)
This is where things get serious.
LibreTranslate is perfect for:
- translating product descriptions
- blog content
- large datasets
👉 basically anything that lives in a database and needs to exist in multiple languages.
⚙️ Backend integration (API-first approach)
Since LibreTranslate exposes a simple REST API, I can plug it into:
- PHP backends
- Node.js services
- Python scripts
It becomes just another internal service — like a database or cache layer.
🔥 My real-world use case (this is why I needed it)
I personally use LibreTranslate in a product import system.
👉 You can read the full context here:
https://pawelnosko.com/php-backend/how-to-import-products-from-any-online-store-product-import-crawler-for-opencart
In short:
- I import products from:
- other online stores
- single-language databases
- and translate them on the fly during import
We’re talking about:
- thousands of products
- translated into multiple languages (e.g. 6 languages)
💥 Why LibreTranslate is a game changer here
Let’s do some quick math.
Assume:
- 1 product = ~500 words
- 1,000 products = 500,000 words
- 6 languages → 3,000,000 words
💰 What would this cost with external APIs?
🔵 DeepL (approx.)
Typical pricing:
- ~€5.99/month + usage
- ~€20 per 1 million characters
👉 3M words ≈ ~15–18M characters
➡️ Cost:
- ~€300–€360 per import 😬
🔴 Google Translate API
- ~$20 per 1 million characters
➡️ Same calculation:
- ~$300–$360 per batch
🟣 LLMs (ChatGPT / DeepSeek style)
Using something like:
- GPT-4 / GPT-4o
- DeepSeek
Costs are even higher depending on tokens.
Rough estimate:
- $5–$15 per 1M tokens (input+output)
For large datasets:
➡️ easily $100–$500+ per import
⚙️ Requirements
Before I even started installing anything, I made sure my environment made sense. LibreTranslate is not super demanding, but it’s also not “tiny”.
Here’s what I used:
- 🐧 Ubuntu 24.04 (or any similar Linux distro)
- 💻 access to terminal (obviously)
- 🐳 Docker (strongly recommended)
- 🧠 RAM:
- minimum → 4 GB
- realistic комфорт → 8–16 GB
- 💾 disk space:
- at least 10 GB (models take space, and they add up)
👉 If you’re planning to process large datasets (like I do), don’t go minimal here. More RAM = smoother experience.
🐳 Step 1: Check if Docker is installed
First thing I did:
docker --versionInterpretation:
- ✅ If you see something like:
Docker version 29.2.1, build a5c7197→ you’re good to go
- ❌ If you get:
command not found→ Docker is not installed yet
🚀 Step 2: Install Docker (if needed)
If Docker is missing, this is the fastest way:
sudo apt update
sudo apt install docker.io docker-compose -y
sudo systemctl enable --now docker
👉 That’s it. No complicated setup needed.
📦 Step 3: Install LibreTranslate (Docker)
Now the fun part:
docker run -d -p 5000:5000 libretranslate/libretranslate
What actually happens behind the scenes:
- 📥 Docker downloads the LibreTranslate image
- 🚀 starts a container
- 📦 LibreTranslate begins downloading language models (~5–8 GB)
⏳ Step 4: First run — this is IMPORTANT
This is where I almost thought I broke something 😅
The first time I installed LibreTranslate:
👉 nothing seemed to work
- API didn’t respond
- browser showed errors
- logs looked stuck on
Booting...
And I was like:
“Okay… something definitely went wrong.”
But no — this is normal.
What’s happening:
- LibreTranslate is:
- downloading models 📥
- unpacking them 📦
- preparing everything internally
What you’ll see:
docker stats→ NET I/O keeps increasing- API endpoints → not responding yet
- curl → connection reset
👉 This can take several minutes (even ~10–15 min) depending on your connection and disk speed.
🔍 Step 5: Check if it works
Once it’s ready, test it:
curl http://127.0.0.1:5000/languages👉 You should get a JSON response with available languages.
If you still get errors — wait a bit more. Seriously.
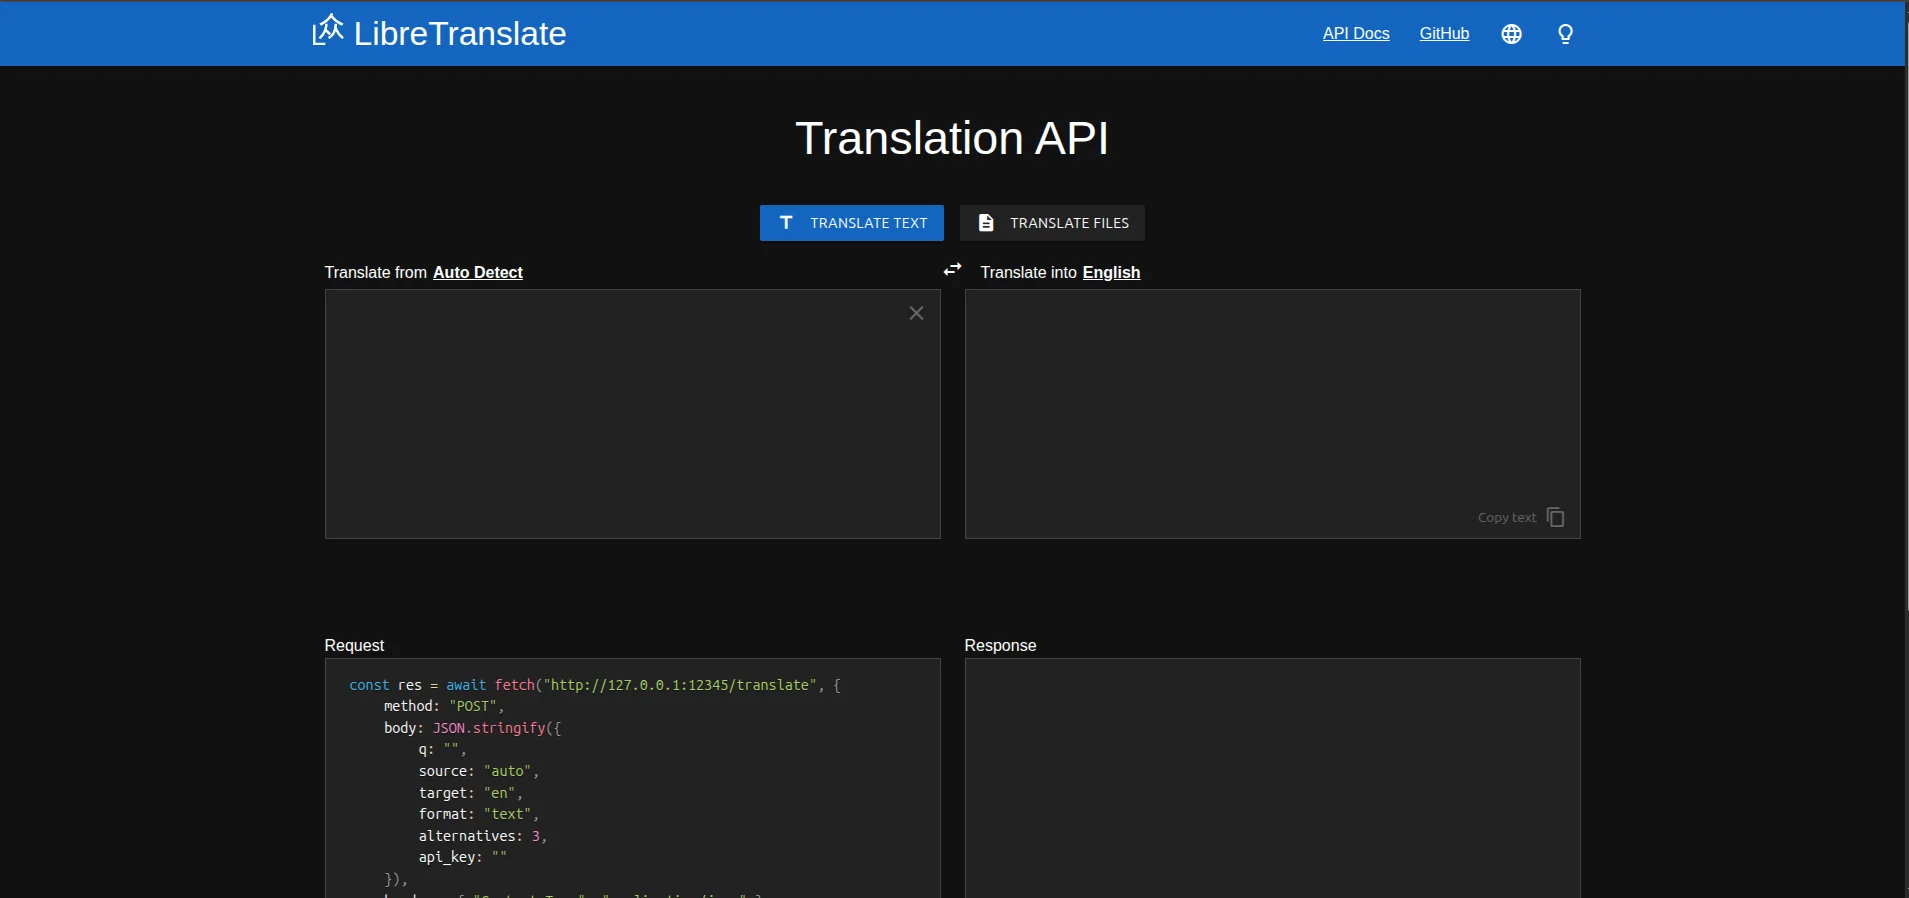
🌐 Step 6: Test in browser
Open:
http://localhost:5000If everything is working:
👉 you’ll see LibreTranslate interface / API response
🧠 My tip
If something “doesn’t work” right after installation:
👉 99% of the time it’s still downloading models
This is the moment where patience > debugging 😄
⚠️ Common Issues (and how I fixed them)
Let’s be honest — it wouldn’t be a real setup without a few things going wrong 😄
Here are the exact issues I ran into and how I solved them.
🔴 Port already in use
Error:
Bind for 0.0.0.0:5000 failed👉 This means something is already using port 5000.
In my case, it was often:
- another Docker container
- a dev server
- or just something I forgot I started earlier 😅
✅ Solution
Just use a different port:
docker run -d -p 12345:5000 libretranslate/libretranslate👉 Now LibreTranslate is available at:
http://localhost:12345
🔴 Connection reset / API not responding
Example:
curl: (56) Recv failure: Connection reset by peer👉 This one confused me at first.
🧠 Cause
LibreTranslate is still downloading and preparing models.
Even though:
- the container is running
- the port is open
→ the app inside is not ready yet
✅ Solution
👉 Do nothing. Seriously.
Just wait a bit and check again:
curl http://127.0.0.1:5000/languages💡 You can monitor progress with:
docker statsIf:
- NET I/O is increasing → it’s working
- just not finished yet
🔴 Conflict with other services (e.g. Ollama)
This one is easy to overlook.
If you’re running tools like Ollama, they might already use popular ports like:
50008080
✅ Solution
👉 Same as before — change the port:
docker run -d -p 12345:5000 libretranslate/libretranslateOr any other free port:
9090300112345
🧠 How LibreTranslate Works (Technically)
At this point, I wanted to understand what’s actually happening under the hood — and it’s surprisingly clean.
LibreTranslate is not some black-box magic. It’s built on a stack designed for offline, efficient translation.
🔧 It uses Argos Translate
Under the hood, LibreTranslate relies on:
- Argos Translate (open-source translation engine)
👉 This is what actually performs the translations.
It works with pre-trained language models that are:
- downloaded during first run
- stored locally
- reused for every request
🧠 CPU-based (no GPU required)
One of the biggest differences compared to modern AI tools:
- ✅ runs on CPU
- ❌ no GPU required
This means:
- it works on almost any machine
- no CUDA / ROCm headaches
- predictable performance
👉 It’s optimized for accessibility, not maximum AI power.
📦 Offline language models
All translations are based on local models.
That’s why during installation you saw:
- several GB being downloaded 📥
Once downloaded:
- no internet is needed
- no external API calls
- everything happens locally
🌐 Simple REST API
This is what makes LibreTranslate so easy to integrate.
It exposes endpoints like:
POST /translate
GET /languages
👉 So from a developer perspective:
- it behaves like any external API
- but runs on your own machine
🆚 LibreTranslate vs AI Models (LLMs)
Now let’s compare it with something like Ollama, which I also use.
These are fundamentally different tools.
⚔️ Key differences
| Feature | LibreTranslate | LLM (Ollama, etc.) |
|---|---|---|
| 🧩 Use case | translations only | general-purpose AI |
| ⚙️ CPU / GPU | CPU | CPU / GPU |
| ⚡ Speed | fast | slower |
| 🧠 Quality | medium | high |
🧠 What this means in practice
LibreTranslate:
- built for one job only → translation
- optimized for speed and scale
- predictable and stable
LLMs:
- can translate and much more
- understand context, tone, nuance
- but are:
- heavier
- slower
- more expensive (resource-wise)
💡 My real-world approach
I don’t treat them as competitors.
I use them together:
- LibreTranslate → bulk translation ⚡
- Ollama → refinement / intelligence 🧠
👉 This combo gives me:
- speed
- quality
- full control
🖥️ AMD GPU / ROCm — the reality (from my setup)
Before going deeper, quick context:
👉 I’m running this on a pretty powerful machine with an AMD GPU:
- Ryzen 9 7950X3D
- 64 GB RAM
- Radeon RX 7900 XTX
So naturally, my first thought was:
“Okay, I’ve got all this GPU power — can I use it for LibreTranslate?”
❌ No official GPU support (especially for AMD)
And here’s the reality:
- LibreTranslate does not officially support GPU acceleration
- especially no support for ROCm (AMD)
- everything is designed around CPU execution
✔️ CPU is actually the intended path
At first, that felt like a limitation.
But after using it in production:
👉 it actually makes sense
- no driver issues
- no CUDA vs ROCm drama
- no compatibility headaches
It just works.
🧪 Experimental GPU setups? Yes… but
I did look into it.
There are:
- community forks
- experimental builds
- attempts to use ROCm
But:
- ⚠️ setup is painful
- ⚠️ dependencies break easily
- ⚠️ stability is questionable
👉 This is not something I’d use in a real project.
🧠 Real-world performance (important insight)
Even on CPU:
- translations are fast
- bulk processing works smoothly
- no bottlenecks in my pipeline
And remember — I’m translating:
- thousands of products
- into multiple languages
👉 and CPU handles it just fine.
🧠 Final conclusion
Even with a high-end AMD GPU:
👉 I don’t use it for LibreTranslate at all
And honestly:
👉 I don’t need to
✔️ CPU is enough
✔️ setup is simple
✔️ stability is excellent
🔗 Apache integration (localhost)
Since I’m running a local stack (Apache + backend), I needed LibreTranslate to fit into it cleanly.
🌐 API endpoint
LibreTranslate exposes a simple endpoint:
http://127.0.0.1:5000/translate
⚠️ The CORS problem
If your frontend runs on:
http://localhostand LibreTranslate on:
http://127.0.0.1:5000👉 browser sees this as different origins
Result:
- blocked requests ❌
✅ Solution: reverse proxy (Apache)
The clean fix is to route everything through Apache.
Example:
ProxyPass /translate http://127.0.0.1:5000/translate
ProxyPassReverse /translate http://127.0.0.1:5000/translate
Then from frontend:
fetch("/translate", ...)👉 no CORS issues
👉 same origin
👉 clean architecture
🚀 Summary
After going through the full setup and real-world usage, here’s my takeaway:
- 🐳 installation via Docker is fast and simple
- 🌐 everything runs locally (offline-ready)
- ⚙️ perfect for automation and backend workflows
- 💰 zero API costs
- 🧠 not a replacement for LLMs — but a perfect complement