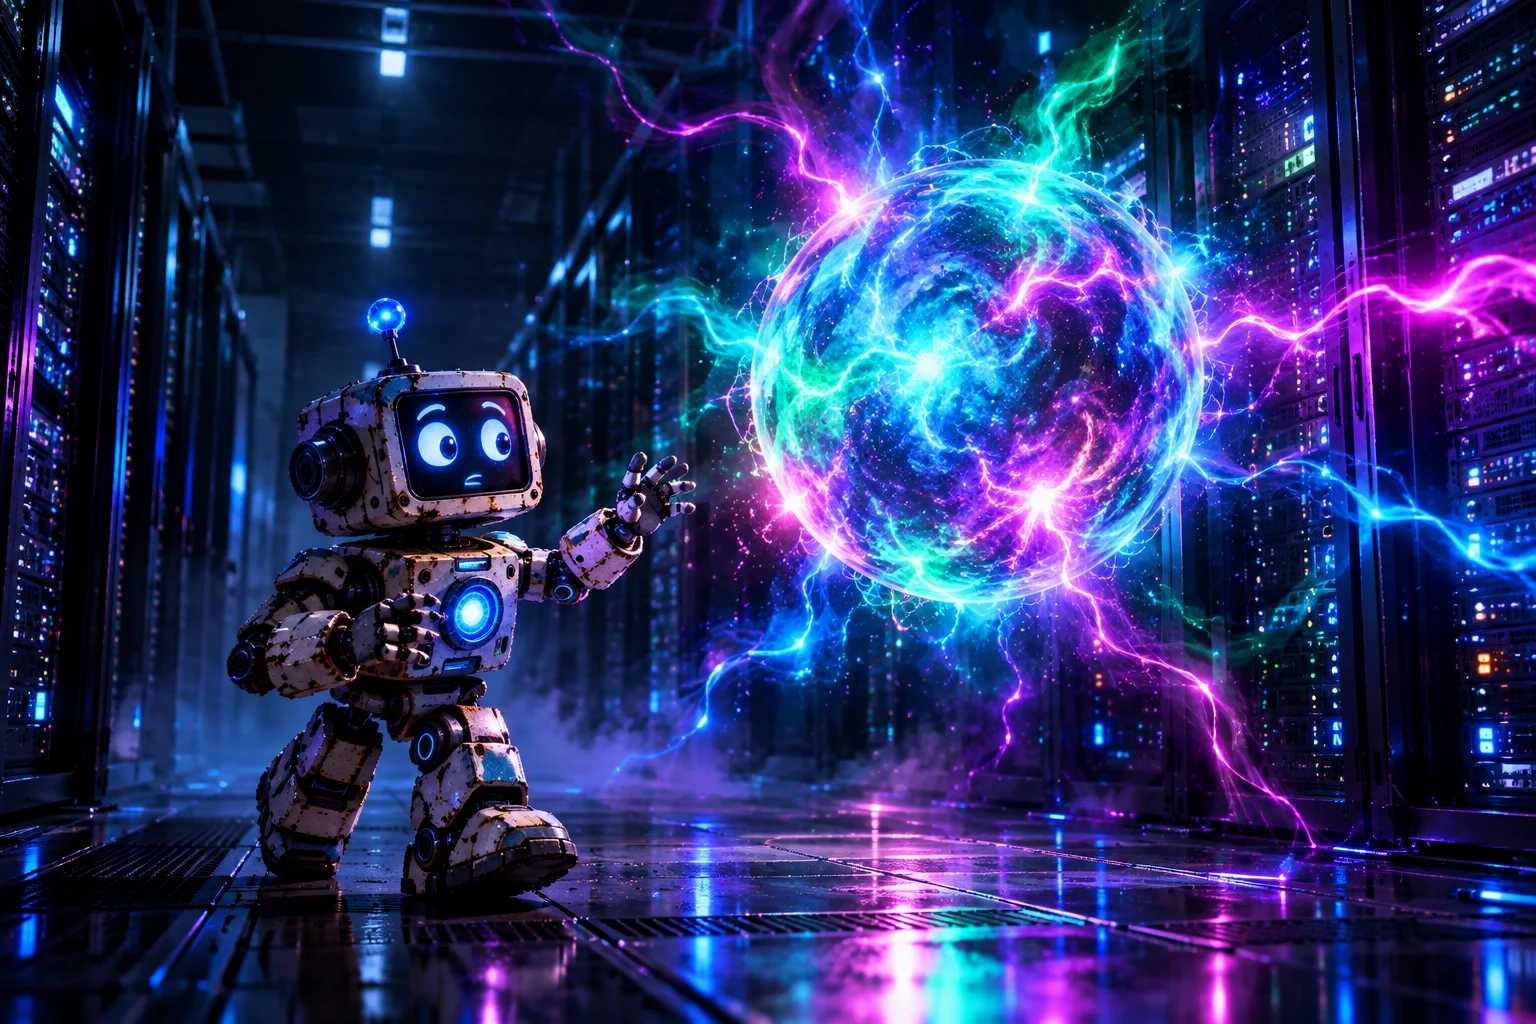
We will not use pre-built 3D models, videos, or external texture files. The plasma is generated procedurally by the GPU, while the lightning geometry is created dynamically using JavaScript.
The complete project fits into a single file named
energy_sphere.html
, containing approximately 266 lines of code.
We will examine the project from beginning to end, explaining how each component works and how the different systems interact. By combining the main code blocks in the order presented, you will have a complete, working animation.

1. Project Overview
Our energy sphere consists of several interconnected systems:
-
Plasma core – an animated GLSL shader generating colorful, irregular energy patterns.
-
30 standard lightning bolts – randomly generated electrical discharges with multiple branches.
-
10 additional lightning bolts – electrical discharges that respond to the mouse cursor.
-
1,400 particles – tiny sparks emitted from the sphere's surface.
-
Procedural nebula – a subtle animated background.
-
Halo and Bloom – lighting effects that enhance the sphere's glow and brighten its most intense areas.
-
User interaction – the sphere can be rotated using the mouse or touch gestures.
Everything is animated in real time. Each newly generated lightning bolt can have a different shape, while the plasma surface continuously changes its appearance.
The interesting part is that we are not playing a predefined animation. We are generating the visual elements using algorithms.
2. Preparing the HTML Document and Libraries
Let's begin by creating a basic HTML document.
<!DOCTYPE html>
<html lang="en">
<head>
<meta charset="utf-8">
<meta name="viewport" content="width=device-width, initial-scale=1, viewport-fit=cover">
<title>Energy Sphere</title>
<style>
:root { box-sizing: border-box; --bg:#000; --fg:#7fb8ff; }
html, body { margin:0; height:100%; background:#000; overflow:hidden; }
canvas { display:block; touch-action:none; }
#hint { position:fixed; left:0; right:0; bottom:calc(14px + env(safe-area-inset-bottom,0px)); text-align:center;
font:12px/1.2 system-ui,sans-serif; color:var(--fg); opacity:.55; pointer-events:none; transition:opacity 1.5s; }
</style>
</head>
<body>
<div id="hint">Drag to rotate · lightning strikes the cursor</div>
<script src="https://cdnjs.cloudflare.com/ajax/libs/three.js/r128/three.min.js"></script>
<script src="https://cdn.jsdelivr.net/npm/This email address is being protected from spambots. You need JavaScript enabled to view it. .0/examples/js/shaders/CopyShader.js"></script>
<script src="https://cdn.jsdelivr.net/npm/This email address is being protected from spambots. You need JavaScript enabled to view it. .0/examples/js/shaders/LuminosityHighPassShader.js"></script>
<script src="https://cdn.jsdelivr.net/npm/This email address is being protected from spambots. You need JavaScript enabled to view it. .0/examples/js/postprocessing/EffectComposer.js"></script>
<script src="https://cdn.jsdelivr.net/npm/This email address is being protected from spambots. You need JavaScript enabled to view it. .0/examples/js/postprocessing/MaskPass.js"></script>
<script src="https://cdn.jsdelivr.net/npm/This email address is being protected from spambots. You need JavaScript enabled to view it. .0/examples/js/postprocessing/RenderPass.js"></script>
<script src="https://cdn.jsdelivr.net/npm/This email address is being protected from spambots. You need JavaScript enabled to view it. .0/examples/js/postprocessing/ShaderPass.js"></script>
<script src="https://cdn.jsdelivr.net/npm/This email address is being protected from spambots. You need JavaScript enabled to view it. .0/examples/js/postprocessing/UnrealBloomPass.js"></script>
<script>
How it works
The CSS sets a black background and prevents the page from scrolling. The
canvas
element, which Three.js will create shortly, will occupy the entire browser window.
The
touch-action: none
property allows us to handle touch gestures without triggering the browser's default scrolling behavior.
The
#hint
element displays a short instruction explaining how to interact with the sphere. It will automatically disappear after a few seconds.
We are using Three.js r128 (0.128.0) . The additional scripts provide the postprocessing functionality, particularly
UnrealBloomPass
.
Notice that we are loading Three.js through traditional
<script>
tags. This approach does not require ES Modules, Node.js, npm, or any build tools.
You can create the project in a simple text editor and run it directly in your browser.
3. Configuring the Animation and Creating the Scene
The next section defines our basic settings and initializes the WebGL renderer.
const R = 2.2;
const CURSOR_ACTION = true; // true = lightning strikes the mouse cursor
const NC = CURSOR_ACTION ? 10 : 0; // number of lightning bolts targeting the cursor
let cursorT = null;
const PAL = [new THREE.Color(0.15,0.55,1), new THREE.Color(0.62,0.28,1), new THREE.Color(0.12,1,0.58)];
const WHITE = new THREE.Color(1,1,1);
const rnd = (a,b)=>a+Math.random()*(b-a);
const rv = ()=>{ const u=Math.random()*2-1, th=Math.random()*6.2832, s=Math.sqrt(1-u*u); return new THREE.Vector3(s*Math.cos(th),u,s*Math.sin(th)); };

const renderer = new THREE.WebGLRenderer({antialias:true});
renderer.setPixelRatio(Math.min(devicePixelRatio,2));
renderer.setSize(innerWidth, innerHeight);
document.body.appendChild(renderer.domElement);

const scene = new THREE.Scene();
const camera = new THREE.PerspectiveCamera(55, innerWidth/innerHeight, .1, 200);
camera.position.z = 13;
const group = new THREE.Group(); scene.add(group);
How it works
The most important settings are:
| Parameter | Description |
|---|---|
R = 2.2
|
Radius of the sphere |
CURSOR_ACTION
|
Enables lightning interaction with the cursor |
NC = 10
|
Number of additional cursor-targeting lightning bolts |
PAL
|
Three colors used by lightning, sparks, and halo |
camera.position.z = 13
|
Camera distance from the center of the scene |
The
rnd(a,b)
function returns a random number within the specified range.
The
rv()
function is more interesting. It generates a random unit vector in three-dimensional space.
We will use it when creating lightning bolts and calculating the movement directions of particles.
WebGLRenderer
handles rendering the scene. We limit
devicePixelRatio
to 2 to avoid placing unnecessary pressure on the GPU, especially on devices with extremely high pixel densities.
Finally, we create a
THREE.Group
.
This group acts as a container for our 3D objects, allowing us to rotate the plasma core, particles, and standard lightning bolts together.
4. Procedural Noise – The Foundation of Our Plasma Animation
Now we move to GLSL.
Instead of loading a texture, we will generate our own procedural noise. The same functions will be used by both the sphere's surface and its background.
const NOISE = `
float hash(vec3 p){p=fract(p*0.3183099+.1);p*=17.0;return fract(p.x*p.y*p.z*(p.x+p.y+p.z));}
float noise(vec3 x){vec3 i=floor(x),f=fract(x);f=f*f*(3.-2.*f);
 return mix(mix(mix(hash(i),hash(i+vec3(1,0,0)),f.x),mix(hash(i+vec3(0,1,0)),hash(i+vec3(1,1,0)),f.x),f.y),
            mix(mix(hash(i+vec3(0,0,1)),hash(i+vec3(1,0,1)),f.x),mix(hash(i+vec3(0,1,1)),hash(i+vec3(1,1,1)),f.x),f.y),f.z);}
float fbm(vec3 p){float a=.5,s=0.;for(int i=0;i<5;i++){s+=a*noise(p);p=p*2.03+vec3(1.7,9.2,3.1);a*=.5;}return s;}
`;
How it works
We have three functions.
hash()
converts spatial coordinates into a pseudorandom value.
noise()
interpolates these values between neighboring points of a 3D grid. This produces smooth transitions rather than abrupt jumps between random values.
fbm()
stands for Fractional Brownian Motion . It combines five layers of noise with increasing frequencies and decreasing amplitudes.
During each iteration, we:
-
Increase the noise frequency by multiplying the coordinates by
2.03. -
Offset the sampling position using an additional vector.
-
Reduce the contribution of the next layer by applying
a *= .5.
The result is an irregular, multi-layered structure.
This is the foundation of our plasma effect. Instead of displaying a flat image, the shader will calculate organic patterns that continuously change over time.
5. The Plasma Core Shader – Generating Living Energy
Next, we create a
THREE.ShaderMaterial
, allowing us to define exactly how the surface of our sphere should look.
// Core: fractal plasma
const coreMat = new THREE.ShaderMaterial({
  uniforms:{t:{value:0}},
  vertexShader:`varying vec3 vN,vP; void main(){vN=normalize(normalMatrix*normal);vP=position;gl_Position=projectionMatrix*modelViewMatrix*vec4(position,1.);}`,
  fragmentShader:`varying vec3 vN,vP; uniform float t;`+NOISE+`
  vec3 pal(float x){x=fract(x)*3.;vec3 b=vec3(.15,.6,1.),pu=vec3(.7,.3,1.),g=vec3(.15,1.,.6);
    vec3 c=mix(b,pu,smoothstep(0.,1.,x));c=mix(c,g,smoothstep(1.,2.,x));return mix(c,b,smoothstep(2.,3.,x));}
  void main(){
    vec3 p=normalize(vP)*2.4;
    float n1=fbm(p+vec3(0.,t*.35,t*.2)), n2=fbm(p*1.7-vec3(t*.3,0.,t*.25)+5.);
    float v=pow(1.-abs(n1*2.-1.),5.), v2=pow(1.-abs(n2*2.-1.),6.);
    float h=fbm(p*.9+vec3(t*.12,-t*.1,t*.08)+11.);
    vec3 col=pal(h*1.6+n2*.6+t*.06);
    vec3 col2=pal(h*1.6+n2*.6+t*.06+.5);
    float f=1.-abs(vN.z);
    float sh=.5+.5*sin(t*2.+n1*9.);
    vec3 body=col*(.25+.6*n1)*(.8+.4*sh);
    vec3 veins=(v+v2)*1.1*col2;
    vec3 rim=pow(f,2.2)*col*1.2;
    vec3 c=body+veins+rim;
    c*=.75; c=max(vec3(0.),mix(vec3(dot(c,vec3(.333))),c,1.6)); c/=max(1.,max(c.r,max(c.g,c.b)));
    gl_FragColor=vec4(c,1.);
  }`
});
group.add(new THREE.Mesh(new THREE.SphereGeometry(R,64,48), coreMat));
How it works
The material uses two types of shaders.
The vertex shader processes the geometry's vertices. It also passes the surface coordinates (
vP
) and normals (
vN
) to the fragment shader.
The fragment shader calculates the surface color based on spatial coordinates and the current animation time.
The most important variable is
t
, passed through
uniforms
. We will update its value during every animation frame.
Let's examine the two main noise fields:
float n1=fbm(p+vec3(0.,t*.35,t*.2)),
      n2=fbm(p*1.7-vec3(t*.3,0.,t*.25)+5.);
Both change in different directions and at different speeds.
This creates overlapping plasma structures instead of a single, repetitive pattern.
Another mechanism produces the bright energy veins:
float v=pow(1.-abs(n1*2.-1.),5.);
float v2=pow(1.-abs(n2*2.-1.),6.);
The power functions emphasize specific regions of the noise field, producing narrower and more visible energy bands.
The
pal()
function handles smooth transitions between blue, purple, and green.
Meanwhile:
vec3 rim=pow(f,2.2)*col*1.2;
creates additional illumination around the sphere's edges.
Finally, we combine three components:
body + veins + rim
These represent the base plasma, the bright energy veins, and the illuminated rim.
The material is applied to a sphere with radius
R
, using 64 horizontal and 48 vertical segments.
6. Procedural Background – An Animated Nebula
The background is not an image either. We generate it using another shader.
// Background: nebula
const bgMat = new THREE.ShaderMaterial({
  side:THREE.BackSide, depthWrite:false, uniforms:{t:{value:0}},
  vertexShader:`varying vec3 vP; void main(){vP=position;gl_Position=projectionMatrix*modelViewMatrix*vec4(position,1.);}`,
  fragmentShader:`varying vec3 vP; uniform float t;`+NOISE+`
  void main(){
    vec3 d=normalize(vP);
    float m=smoothstep(.4,.85,fbm(d*3.+t*.03));
    vec3 c=mix(vec3(0.,.3,.3),vec3(.15,0.,.4),fbm(d*2.+7.));
    gl_FragColor=vec4(c*m*.35,1.);
  }`
});
scene.add(new THREE.Mesh(new THREE.SphereGeometry(80,32,24), bgMat));
How it works
We create a large sphere with a radius of 80 units, surrounding the camera.
Setting
THREE.BackSide
makes its interior surface visible.
Inside the fragment shader, we use
fbm()
again, but this time with a much slower animation:
t*.03
The variable
m
controls the nebula's intensity.
The
mix()
function blends two colors: turquoise and purple.
Finally, we multiply the result by
0.35
, keeping the background subtle enough that it does not distract from the main sphere.
7. Generating the Glow Texture
Our lightning bolts and particles should resemble actual sources of light.
To achieve this, we generate a soft radial texture.
// Soft glow texture
function glowTex(){
  const c=document.createElement('canvas'); c.width=c.height=128; const x=c.getContext('2d');
  const g=x.createRadialGradient(64,64,0,64,64,64);
  g.addColorStop(0,'rgba(255,255,255,1)'); g.addColorStop(.3,'rgba(255,255,255,.35)'); g.addColorStop(1,'rgba(255,255,255,0)');
  x.fillStyle=g; x.fillRect(0,0,128,128); return new THREE.CanvasTexture(c);
}
const GT = glowTex();
const halo = new THREE.Sprite(new THREE.SpriteMaterial({map:GT,blending:THREE.AdditiveBlending,transparent:true,depthWrite:false,opacity:.6}));
halo.scale.set(10,10,1); scene.add(halo);
const curGlow = new THREE.Sprite(new THREE.SpriteMaterial({map:GT,blending:THREE.AdditiveBlending,transparent:true,depthWrite:false,opacity:0}));
curGlow.scale.set(1.6,1.6,1); scene.add(curGlow);
How it works
The
glowTex()
function creates an auxiliary canvas measuring 128 × 128 pixels.
Using
createRadialGradient()
, we generate a gradient with a bright white center that gradually fades into complete transparency.
The canvas is then converted into a
THREE.CanvasTexture
.
No external PNG file is required.
Next, we create two sprites.
halo
is the large glow surrounding the sphere.
curGlow
is smaller and initially invisible. It appears near the point targeted by the cursor-directed lightning bolts.
Both use
THREE.AdditiveBlending
.
Additive blending makes overlapping light sources appear brighter, helping us create an energetic, luminous effect.
8. Building the Lightning System
Now we reach one of the most important parts of the project.
First, we need to prepare the geometry and materials used by the electrical discharges.
// Lightning bolts (fractal branching)
const MAXSEG=1200, MAXNODE=120, NB=30;
const bolts=[];
for(let i=0;i<NB+NC;i++){
  const g=new THREE.BufferGeometry();
  g.setAttribute('position',new THREE.BufferAttribute(new Float32Array(MAXSEG*6),3));
  g.setAttribute('color',new THREE.BufferAttribute(new Float32Array(MAXSEG*6),3));
  g.setDrawRange(0,0);
  const m=new THREE.LineBasicMaterial({vertexColors:true,transparent:true,blending:THREE.AdditiveBlending,depthWrite:false});
  const line=new THREE.LineSegments(g,m); line.frustumCulled=false;
  const gp=new THREE.BufferGeometry();
  gp.setAttribute('position',new THREE.BufferAttribute(new Float32Array(MAXNODE*3),3));
  gp.setAttribute('color',new THREE.BufferAttribute(new Float32Array(MAXNODE*3),3));
  gp.setDrawRange(0,0);
  const pm=new THREE.PointsMaterial({size:.22,map:GT,vertexColors:true,transparent:true,blending:THREE.AdditiveBlending,depthWrite:false});
  const pts=new THREE.Points(gp,pm); pts.frustumCulled=false;
  (i<NB?group:scene).add(line,pts);
  bolts.push({g,m,gp,pm,count:0,nc:0,age:-rnd(0,1.5),life:1,fresh:true,cur:i>=NB});
}
How it works
Our project uses two types of lightning.
Standard lightning bolts are generated around the sphere and rotate together with it.
Additional lightning bolts are placed directly in the scene and can be directed toward the cursor.
For each lightning bolt, we create two objects.
THREE.LineSegments
contains the actual lightning geometry, consisting of multiple line segments.
THREE.Points
renders glowing points at selected locations, including branching points.
An important role is played by
BufferGeometry
.
Instead of repeatedly creating new graphical objects, we allocate buffers into which we can write updated lightning coordinates.
MAXSEG = 1200
specifies that each lightning buffer can accommodate up to 1,200 segments.
Each segment consists of two points in 3D space. Since each point has three coordinates, we allocate
MAXSEG * 6
numeric values.
Using
setDrawRange()
, we can control how many segments are currently visible.
We will use this feature to animate the lightning bolts as they grow outward from the sphere.
9. The Lightning Generation Algorithm – Recursive Branching
Now we come to one of the most interesting pieces of JavaScript in the entire project.
The
gen()
function creates a new lightning bolt, while its internal recursive
trace()
function generates individual segments and branches.
function gen(b){
  const segs=[], nodes=[];
  const tgt=(b.cur&&cursorT)?cursorT.clone():null;
  const d0=tgt?tgt.clone().normalize().add(rv().multiplyScalar(rnd(.1,.55))).normalize():rv(), c1=PAL[(Math.random()*3)|0], c2=PAL[(Math.random()*3)|0];
  const total=tgt?tgt.length()*1.6+3:rnd(4,9);
  function trace(p,d,len,depth,dist){
    let pos=p.clone(), dir=d.clone(), L=0;
    const dr=rv().multiplyScalar(.5);
    while(L<len && segs.length<MAXSEG){
      dir.addScaledVector(dr,.08).add(rv().multiplyScalar(.32-depth*.05)).normalize();
      if(tgt&&depth===0){
        const to=tgt.clone().sub(pos), dl=to.length();
        if(dl<.25){
          segs.push({a:pos,b:tgt.clone(),t0:(dist+L)/total,t1:(dist+L+dl)/total,d:dist+L,dep:0});
          if(nodes.length<MAXNODE)nodes.push({p:tgt.clone(),t:1});
          for(let k=0;k<3;k++)trace(tgt.clone(),rv(),rnd(.5,1.2),2,dist+L);
          break;
        }
        dir.addScaledVector(to.normalize(),.45).normalize();
      }
      const sl=rnd(.12,.26), nx=pos.clone().addScaledVector(dir,sl);
      segs.push({a:pos,b:nx,t0:(dist+L)/total,t1:(dist+L+sl)/total,d:dist+L,dep:depth});
      L+=sl;
      if(depth<4 && Math.random()<.15-depth*.02){
        if(nodes.length<MAXNODE) nodes.push({p:nx,t:(dist+L)/total});
        trace(nx,dir.clone().addScaledVector(rv(),1.0).normalize(),rnd(.8,2.6)/(1+depth*.5),depth+1,dist+L);
      }
      pos=nx;
    }
  }
  trace(d0.clone().multiplyScalar(R*.97),d0,total,0,0);
  segs.sort((x,y)=>x.d-y.d);
  const P=b.g.attributes.position.array, C=b.g.attributes.color.array, tmp=new THREE.Color();
  const col=(t,dep,out,o)=>{
    t=Math.min(1,t);
    tmp.copy(c1).lerp(c2,t).lerp(WHITE,.12*(1-t));
    const k=(1-t*.55)*(dep?.85/(1+dep*.4):1.3);
    out[o]=tmp.r*k; out[o+1]=tmp.g*k; out[o+2]=tmp.b*k;
  };
  segs.forEach((s,i)=>{
    const o=i*6;
    P[o]=s.a.x;P[o+1]=s.a.y;P[o+2]=s.a.z;P[o+3]=s.b.x;P[o+4]=s.b.y;P[o+5]=s.b.z;
    col(s.t0,s.dep,C,o); col(s.t1,s.dep,C,o+3);
  });
  const NP=b.gp.attributes.position.array, NC=b.gp.attributes.color.array;
  nodes.forEach((n,i)=>{
    NP[i*3]=n.p.x;NP[i*3+1]=n.p.y;NP[i*3+2]=n.p.z;
    col(n.t,0,NC,i*3);
  });
  b.g.attributes.position.needsUpdate=b.g.attributes.color.needsUpdate=true;
  b.gp.attributes.position.needsUpdate=b.gp.attributes.color.needsUpdate=true;
  b.count=segs.length; b.nc=nodes.length;
  b.life=b.cur?rnd(.25,.6):rnd(.5,1.4); b.age=b.fresh?b.age:-rnd(0,.3); b.fresh=false;
}
How it works
The algorithm begins by selecting a starting position on the sphere's surface and calculating an initial direction.
For standard lightning bolts, the direction is completely random.
For cursor-targeting lightning bolts, we also take the direction toward the target into account.
How is a lightning bolt generated?
The
trace()
function starts with a position
p
, a direction
d
, and the desired length
len
.
It then enters a loop, moving the current position forward in short steps.
const sl=rnd(.12,.26),
      nx=pos.clone().addScaledVector(dir,sl);
Each step has a random length between 0.12 and 0.26 units.
The direction is also modified randomly, preventing the lightning from forming a perfectly straight line.
How are branches created?
Branches are generated through recursive calls to
trace()
:
trace(
  nx,
  dir.clone().addScaledVector(rv(),1.0).normalize(),
  rnd(.8,2.6)/(1+depth*.5),
  depth+1,
  dist+L
);
A new branch starts at the current point, receives a modified direction, and is assigned its own length.
The
depth
parameter describes the branching level.
The maximum recursion depth is limited to 4.
The probability of creating another branch decreases with depth. This helps keep the main lightning structure visible while preventing smaller branches from overwhelming the entire effect.
How does lightning target the cursor?
For lightning bolts with a target position stored in
tgt
, the main branch gradually adjusts its direction.
dir.addScaledVector(to.normalize(),.45).normalize();This is an important detail.
We do not draw a rigid, straight line between the sphere and the mouse cursor.
The algorithm continues introducing random deviations, creating a more natural electrical discharge while still moving toward the target.
When the lightning gets sufficiently close, a final segment connects it to the target position.
Coloring the lightning
Each bolt receives two random colors selected from the
PAL
array.
The
col()
function interpolates between them along the lightning's length, while secondary branches receive reduced brightness.
Finally, the calculated positions and colors are written into
BufferGeometry
.
We do not create a new
LineSegments
object every time a lightning bolt is generated. Instead, we update the existing geometry.
10. Particle System – Sparks Emitted from the Sphere
Our next component is the particle system.
// Sparks
const NPART=1400, pPos=new Float32Array(NPART*3), pCol=new Float32Array(NPART*3), pBase=new Float32Array(NPART*3), pVel=new Float32Array(NPART*3), pLife=new Float32Array(NPART);
function resetP(i){
  const d=rv(), v=d.clone().multiplyScalar(rnd(.3,1.6)).add(rv().multiplyScalar(.3)), c=PAL[(Math.random()*3)|0];
  pPos.set([d.x*R,d.y*R,d.z*R],i*3); pVel.set([v.x,v.y,v.z],i*3);
  const k=rnd(.5,1.2); pBase.set([c.r*k,c.g*k,c.b*k],i*3); pLife[i]=rnd(.8,3);
}
for(let i=0;i<NPART;i++){ resetP(i); pLife[i]*=Math.random(); }
const pg=new THREE.BufferGeometry();
pg.setAttribute('position',new THREE.BufferAttribute(pPos,3));
pg.setAttribute('color',new THREE.BufferAttribute(pCol,3));
const parts=new THREE.Points(pg,new THREE.PointsMaterial({size:.07,map:GT,vertexColors:true,transparent:true,blending:THREE.AdditiveBlending,depthWrite:false}));
parts.frustumCulled=false; group.add(parts);
How it works
We create 1,400 particles, each with its own properties.
-
pPosstores the particle's position. -
pColstores its current color. -
pBasestores its initial color. -
pVelstores its velocity. -
pLifestores its remaining lifetime.
The
resetP()
function generates a random starting position on the sphere's surface, a movement direction, a color, and a lifetime.
Each particle normally receives a lifetime between 0.8 and 3 seconds, although the initial lifetimes are randomized further to distribute the particles across different stages of their animation.
All particles are rendered through a single
THREE.Points
object.
This is much more practical than creating 1,400 separate 3D meshes.
11. Bloom – Enhancing the Lighting
We now have plasma, lightning bolts, and particles.
Let's add postprocessing.
// Bloom
let composer=null;
try{
  composer=new THREE.EffectComposer(renderer);
  composer.addPass(new THREE.RenderPass(scene,camera));
  composer.addPass(new THREE.UnrealBloomPass(new THREE.Vector2(innerWidth,innerHeight),1.1,.7,.35));
}catch(e){ composer=null; }
How it works
EffectComposer
allows us to apply additional processing operations to the rendered image.
The first pass,
RenderPass
, renders the regular scene.
The second pass,
UnrealBloomPass
, adds a glowing appearance to its brightest areas.
The parameters used in our project are:
| Parameter | Value |
|---|---|
| Strength | 1.1 |
| Radius | 0.7 |
| Threshold | 0.35 |
This gives the lightning bolts additional brightness and makes the sphere appear more energetic.
The initialization is wrapped inside a
try...catch
block.
If the composer cannot be initialized, the application can fall back to rendering the scene without Bloom.
12. Mouse Controls and Calculating the Cursor Position in 3D
Next, we need to make our sphere interactive.
// Rotation using mouse / touch
let rx=0, ry=0, drag=false, px=0, py=0;
addEventListener('pointerdown',e=>{setCursor(e);drag=true;px=e.clientX;py=e.clientY;document.getElementById('hint').style.opacity=0;});
addEventListener('pointerup',e=>{drag=false;if(e.pointerType==='touch')cursorT=null;});
addEventListener('pointermove',setCursor);
document.documentElement.addEventListener('mouseleave',()=>{cursorT=null;});
const ndcV=new THREE.Vector3();
function setCursor(e){
  if(!CURSOR_ACTION)return;
  camera.updateMatrixWorld();
  ndcV.set(e.clientX/innerWidth*2-1,-(e.clientY/innerHeight)*2+1,.5).unproject(camera);
  const d=ndcV.sub(camera.position).normalize(), o=camera.position;
  const bb=o.dot(d), cc=o.dot(o)-R*R, disc=bb*bb-cc;
  cursorT = disc>0 ? o.clone().addScaledVector(d,-bb-Math.sqrt(disc)).multiplyScalar(1.04)
                   : o.clone().addScaledVector(d,-o.z/d.z);
}
addEventListener('pointermove',e=>{ if(!drag)return; ry+=(e.clientX-px)*.006; rx=Math.max(-1.2,Math.min(1.2,rx+(e.clientY-py)*.006)); px=e.clientX; py=e.clientY; });
addEventListener('resize',()=>{
  camera.aspect=innerWidth/innerHeight; camera.updateProjectionMatrix();
  renderer.setSize(innerWidth,innerHeight); if(composer) composer.setSize(innerWidth,innerHeight);
});
How it works
We use the
pointerdown
,
pointermove
, and
pointerup
events, which support both mouse and touch input.
When the user drags, we update two rotation angles:
rx
and
ry
.
The vertical rotation is limited to the range from -1.2 to 1.2 radians.
The more interesting part is the
setCursor()
function.
The mouse cursor exists in a two-dimensional coordinate system, but our lightning bolts move through three-dimensional space.
We therefore need to convert the cursor's screen position into a point in our 3D scene.
We accomplish this using:
ndcV.set(
  e.clientX/innerWidth*2-1,
  -(e.clientY/innerHeight)*2+1,
  .5
).unproject(camera);
The
unproject()
method converts normalized device coordinates back into a position in 3D space using the camera's projection.
Next, we calculate a ray originating from the camera and check whether it intersects the mathematical surface of the sphere.
If an intersection exists, we obtain the point where the ray meets the sphere.
Otherwise, we calculate a target point on the
z = 0
plane.
The result is stored in
cursorT
.
This variable is later used by the lightning generation algorithm.
Finally, we also handle browser resizing by updating the camera's aspect ratio and the renderer's dimensions.
13. The Main Animation Loop
We have reached the final major JavaScript section.
This function connects all previously created systems and updates them during every animation frame.
let time=0, last=performance.now();
const hc=new THREE.Color();
function frame(now){
  requestAnimationFrame(frame);
  const dt=Math.min(.05,(now-last)/1000); last=now; time+=dt;
  coreMat.uniforms.t.value=time; bgMat.uniforms.t.value=time;
  group.rotation.y=ry+time*.08; group.rotation.x=rx;

  for(const b of bolts){
    if(b.cur&&!cursorT){b.g.setDrawRange(0,0);b.gp.setDrawRange(0,0);b.age=-rnd(0,.2);b.fresh=true;continue;}
    b.age+=dt;
    if(b.age<0){ b.g.setDrawRange(0,0); b.gp.setDrawRange(0,0); continue; }
    if(b.age>=b.life || b.fresh){ gen(b); if(b.age>=0&&b.age>=b.life)b.age=0; }
    const t=b.age/b.life, grow=Math.min(1,t/.25), e=1-Math.pow(1-grow,2);
    const fade=t<.25?1:1-(t-.25)/.75, fl=.7+Math.random()*.3;
    b.m.opacity=b.pm.opacity=fade*fl;
    b.g.setDrawRange(0,Math.floor(b.count*e)*2);
    b.gp.setDrawRange(0,Math.floor(b.nc*e));
  }

  for(let i=0;i<NPART;i++){
    const o=i*3; pLife[i]-=dt;
    if(pLife[i]<=0){ resetP(i); }
    pPos[o]+=pVel[o]*dt; pPos[o+1]+=pVel[o+1]*dt; pPos[o+2]+=pVel[o+2]*dt;
    const k=Math.min(1,pLife[i]);
    pCol[o]=pBase[o]*k; pCol[o+1]=pBase[o+1]*k; pCol[o+2]=pBase[o+2]*k;
  }
  pg.attributes.position.needsUpdate=pg.attributes.color.needsUpdate=true;

  const ph=time*.4;
  hc.copy(PAL[0]).lerp(PAL[1],(Math.sin(ph)+1)/2).lerp(PAL[2],(Math.sin(ph*.7+2)+1)/4);
  halo.material.color.copy(hc);
  if(CURSOR_ACTION){ if(cursorT){curGlow.position.copy(cursorT);curGlow.material.color.copy(hc);curGlow.material.opacity=.55+.35*Math.random();} else curGlow.material.opacity=0; }
  const pulse=1+Math.sin(time*3)*.05; halo.scale.set(10*pulse,10*pulse,1);

  if(composer) composer.render(); else renderer.render(scene,camera);
}
requestAnimationFrame(frame);
setTimeout(()=>{ const h=document.getElementById('hint'); if(h) h.style.opacity=0; },6000);
How it works
The
frame()
function is executed through
requestAnimationFrame()
.
At the beginning of each frame, we calculate how much time has passed since the previous update:
const dt=Math.min(.05,(now-last)/1000);Limiting the delta time to 0.05 seconds prevents excessively large simulation steps.
We then update the shaders' uniforms:
coreMat.uniforms.t.value=time;
bgMat.uniforms.t.value=time;
This allows the plasma and nebula to change continuously.
The sphere also receives automatic rotation:
group.rotation.y=ry+time*.08;
group.rotation.x=rx;
Animating the lightning bolts
For each lightning bolt, we check its current age.
If its lifetime has ended, the
gen()
function prepares a new discharge.
Otherwise, we update the number of visible segments and the material's opacity.
One of the most important instructions is:
b.g.setDrawRange(0,Math.floor(b.count*e)*2);Instead of displaying the entire lightning bolt immediately, we gradually increase the number of visible segments.
This makes the electrical discharge appear to grow outward from the sphere.
The glowing nodes are updated in a similar way.
Updating the particles
In the next loop, we decrease each particle's remaining lifetime, move its position according to its velocity, and gradually reduce its color intensity.
Once a particle's lifetime reaches zero, we call
resetP()
.
The particle returns to the sphere's surface and begins a new cycle.
Animating the halo
Finally, we update the halo's color and make its size pulse slightly.
const pulse=1+Math.sin(time*3)*.05;
halo.scale.set(10*pulse,10*pulse,1);
The sine function smoothly increases and decreases the halo's scale.
When a cursor target is active, we also display an additional glow near the lightning's target position.
The final instruction renders the scene through the composer or directly through the renderer.
14. Closing the HTML Document
The last step is to close our HTML document.
</script>
</body>
</html>
That's it.
After combining the main code blocks in the correct order, we have a complete
energy_sphere.html
file.
The code above follows the original implementation, with the on-screen instructions and code comments translated into English.
15. Customizing the Energy Sphere
One of the advantages of this project is how easily we can modify its appearance and behavior.
The most important settings are defined as JavaScript constants.
| Parameter | Default | Description |
|---|---|---|
R
|
2.2 | Sphere radius |
NB
|
30 | Number of standard lightning bolts |
NC
|
10 | Number of cursor-targeting lightning bolts |
NPART
|
1400 | Number of particles |
MAXSEG
|
1200 | Maximum segment capacity per lightning bolt |
MAXNODE
|
120 | Maximum glowing node capacity |
CURSOR_ACTION
|
true | Enables lightning interaction with the cursor |
Changing the colors
The lightning, particles, and halo use colors defined in the
PAL
array.
You can replace the existing blue, purple, and green values with your own color combinations.
However, the plasma core uses a separate color palette defined inside the fragment shader's
pal()
function.
The background nebula also has its own colors.
If you want a completely consistent color scheme, you should adjust all three areas.
Changing the animation speed
The sphere's automatic rotation is controlled by:
time*.08
Increasing this multiplier will make the sphere rotate faster.
The plasma animation speed is controlled by the time multipliers inside the fragment shader's
fbm()
calculations.
This means you can change the speed of the plasma independently from the sphere's rotation.
You can also modify the lightning lifetime ranges and the Bloom effect's intensity.
Disabling cursor interaction
If you want the energy sphere to work purely as a decorative animation, change:
const CURSOR_ACTION = false;This disables the additional cursor-targeting lightning system while preserving the standard discharges and other visual effects.
Improving performance
The animation uses procedural shaders, dynamically generated lightning geometry, and a system containing 1,400 particles.
On less powerful devices, you can experiment with reducing
NPART
and
NB
.
You can also lower the renderer's pixel ratio or disable Bloom.
These modifications can reduce rendering and JavaScript processing costs, although actual performance will depend on the device and browser.
16. Practical Applications
An interactive energy sphere can be used for much more than demonstrating the capabilities of Three.js.
Technology and AI websites
The sphere could become the central visual element of a website's hero section, reacting to cursor movement while presenting a futuristic appearance.
Developer portfolios and creative studios
This project demonstrates practical applications of procedural graphics, GLSL shaders, recursive algorithms, and dynamically generated 3D geometry.
It could work particularly well as part of an interactive developer portfolio.
Games and science-fiction projects
The same techniques could be adapted to represent an energy reactor, magical artifact, force field, or futuristic device.
Changing the shader colors and lightning behavior would allow us to create many variations of the same concept.
Interactive interfaces
The lightning bolts could be connected to application events.
For example, electrical discharges might react to clicks, data transfers, or changes in the application's state.
The current project already provides the basic mechanisms required to build such interactions.
Music visualizers
By extending the project with the Web Audio API, we could make the plasma, lightning, and halo react to sound intensity and frequency.
The current implementation does not include audio analysis, but the shader uniforms and animation parameters provide a convenient foundation for this type of extension.
17. Download


18. Conclusion
In a single HTML document, we combined several different techniques used in computer graphics.
Three.js handles the 3D scene and rendering. GLSL shaders generate procedural plasma and the animated nebula. JavaScript creates branching lightning bolts, animates particles, and manages user interaction.
The visual result is enhanced through additive blending, glowing sprites, and postprocessing.
The greatest advantage of this approach is the amount of control we have over the animation.
We can modify its appearance, behavior, colors, speed, and intensity without creating new graphic assets.
And most importantly, we are not simply replaying a previously recorded sequence.
We are generating the animation through our own algorithms, directly inside the user's browser.

Paweł Nosko
Paweł Nosko — a developer and founder of Design Cart, active in the IT industry since 2009 and focused on e-commerce since 2011. He specializes in building online stores and advanced product configurators. He has delivered over 100 projects, working with platforms such as OpenCart, PrestaShop, Magento, and WooCommerce. He combines technical expertise with a business mindset — his solutions don’t just work, they sell. On his blog, he shares practical insights, tests, and analysis of e-commerce tools — no theory, just real experience.