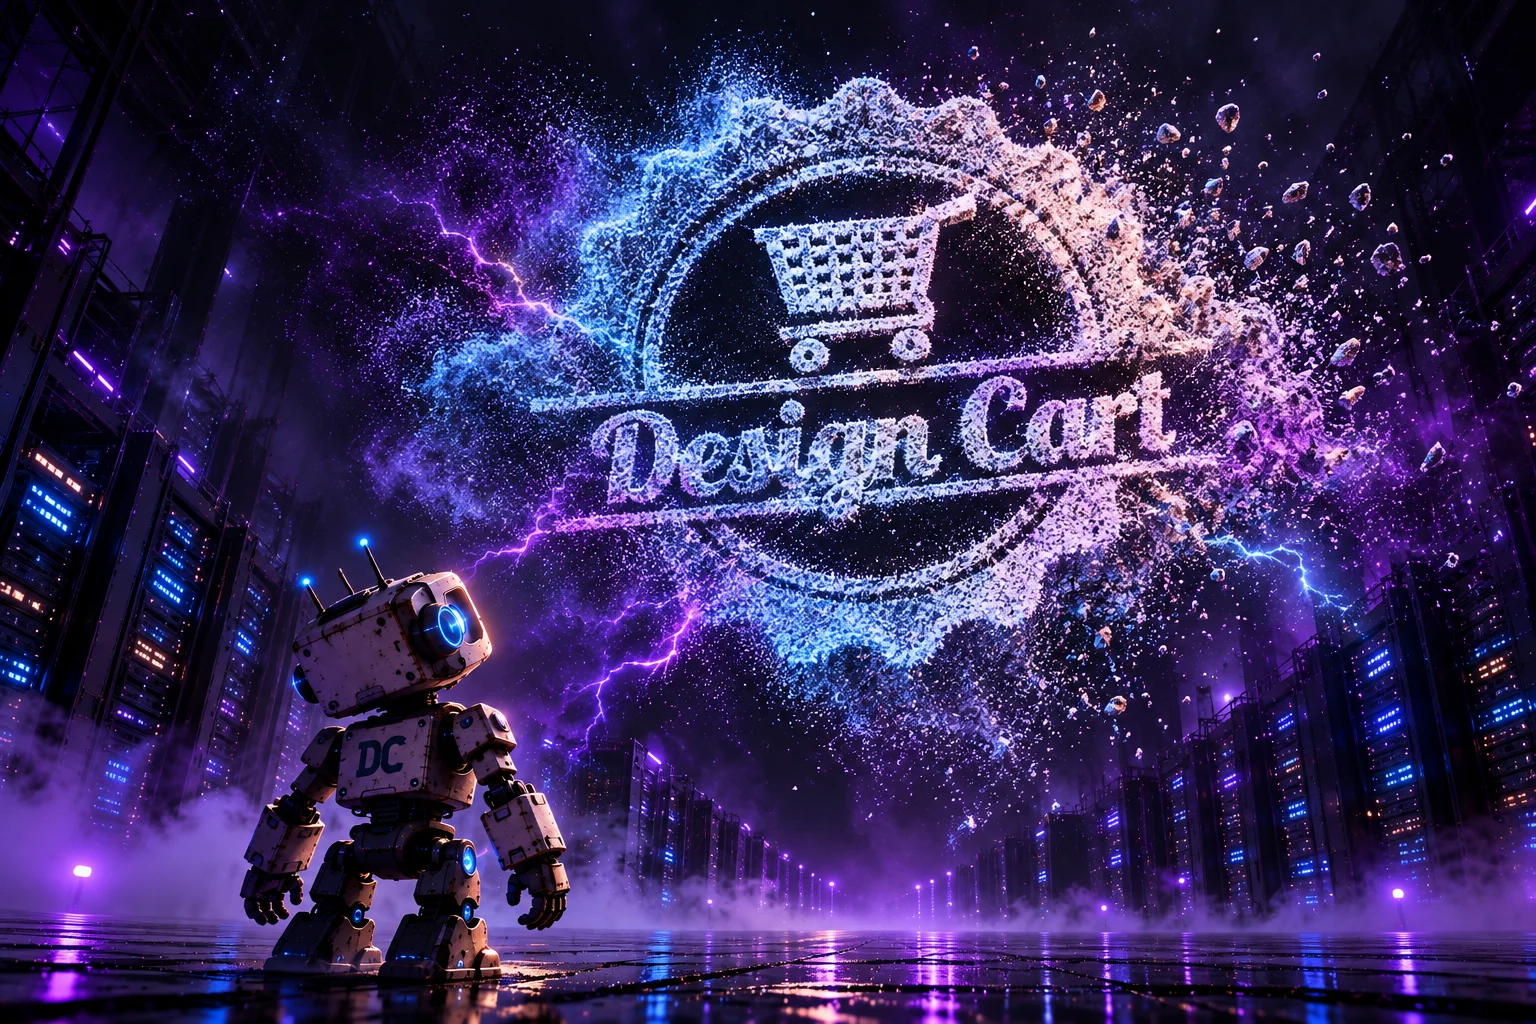
I didn't want to build an effect limited to animating logos. Instead, I developed a universal system that breaks the surface of a 3D model into thousands of particles and restores its original shape. I chose a three-dimensional Design Cart logo for the demonstration, but my algorithm works with mesh triangles, not letters or logo artwork. By replacing the geometry data, I can use the same approach to animate a product, sculpture, architectural form, or another 3D object.
In my sample scene, I placed 140,000 particles on the object's surface, 22,000 grains in an orbital ring, lightning bolts, light waves, and 1,400 stars. I linked disintegration to camera movement: when I rotate the view, the model breaks apart; when the movement stops, it reconstructs itself automatically. I implement the main animation in a GLSL vertex shader, so I don't have to recalculate every particle position on the CPU in each frame.
In this article, I walk through the HTML, CSS, JavaScript, and GLSL code from my project, section by section. I have left the minified Three.js r128 library, OrbitControls, and very long Base64 strings containing the sample model in the source files. Those are dependencies and data, rather than the custom algorithm I want to explain. At the end, I also show how to replace the geometry and apply the same effect to a different object.

1. Project Overview — From Any 3D Mesh to Animated Particles
I used a 3D Design Cart logo for the demonstration, but my system works with 140,000 points sampled from the surface of a triangle mesh. I do not analyze text or the outline of a logo: the algorithm receives vertex coordinates and triangle indices. As I rotate the camera, I scatter the points through space; when the movement stops, I return them to their stored positions. I enhanced the scene with several additional effects:
- 22,000 particles forming a rotating dust ring with uneven density;
- 1,400 stars forming the background;
- colorful lightning bolts between the edge of the logo and the ring, managed through four shared event slots;
- energy waves traveling around the ring, synchronized with lightning strikes;
- thin, colorful energy streaks animated on the logo by a shader;
- a logo color picker that saves the selection to
localStorage; - camera controls using
OrbitControls, with damping, rotation, and zoom.
My most important design decision was to generate the particle geometry only once, then handle disintegration and reconstruction in a GPU vertex shader. I do not recalculate all 140,000 positions in JavaScript on every frame.
2. Project Structure
Initially, I put the entire solution into a single HTML file: minified Three.js, OrbitControls code, encoded geometry, and my own animation. For clarity in this tutorial, I split those elements into separate files without changing how the effect works:
threejs-sand-logo/
├── index.html
├── vendor/
│   ├── three.min.js
│   └── OrbitControls.js
└── js/
    ├── logo-data.js
    └── animation.js
In the vendor/ directory, I placed Three.js r128 and the camera controller, keeping the required Three.js MIT license notices. logo-data.js contains the sample model data, while animation.js contains the main code I explain below. I included all of these files in the project archive.
3. HTML and CSS — Full-Screen Canvas and Color Picker
I started with HTML and CSS. Below is the beginning of the original document, with the large, embedded library scripts omitted.
<!DOCTYPE html>
<html lang="en"><head><meta charset="utf-8">
<meta name="viewport" content="width=device-width, initial-scale=1, viewport-fit=cover">
<title>Design Cart 3D</title>
<style>
:root{--bg:#0a0c11;--fg:#9aa3b2;box-sizing:border-box;padding-top:env(safe-area-inset-top,0px);padding-bottom:env(safe-area-inset-bottom,0px)}
@media (prefers-color-scheme:dark){:root:not([data-theme="light"]){--bg:#0a0c11;--fg:#9aa3b2}}
:root[data-theme="dark"]{--bg:#0a0c11;--fg:#9aa3b2}
html{scroll-padding-top:env(safe-area-inset-top,0px)}
html,body{height:100%;margin:0;overflow:hidden}
body{background:var(--bg);font-family:system-ui,-apple-system,"Segoe UI",Roboto,sans-serif}
#c{display:block;width:100%;height:100%;touch-action:none;cursor:grab}
#c:active{cursor:grabbing}
#pick{position:fixed;top:calc(12px + env(safe-area-inset-top,0px));right:12px;display:flex;align-items:center;gap:8px;padding:6px 10px;background:rgba(20,24,32,.72);color:var(--fg);border:1px solid rgba(255,255,255,.14);border-radius:10px;font-size:12px}
#pick input{width:34px;height:26px;border:0;padding:0;background:none;cursor:pointer}
#pick span{font-variant-numeric:tabular-nums;min-width:56px}
#hint{position:fixed;left:0;right:0;bottom:calc(14px + env(safe-area-inset-bottom,0px));text-align:center;color:var(--fg);font-size:13px;opacity:.75;pointer-events:none;padding:0 12px}
</style></head><body>
<canvas id="c"></canvas>
<div id="pick"><label for="lc">Logo color</label><input type="color" id="lc" value="#f7faff"><span id="hx">#F7FAFF</span></div>
<div id="hint">Rotate the view to scatter the logo into sand · release to reassemble it</div>
#c is the WebGL canvas on which I render the entire scene. With touch-action: none, I can handle touch gestures without unintentionally scrolling the page. I use #pick for the color picker and its HEX value, while #hint displays a short instruction for interacting with the demonstration model.
At the end of the document, I load the scripts in the following order:
<script src="/vendor/three.min.js"></script>
<script src="/vendor/OrbitControls.js"></script>
<script src="/js/logo-data.js"></script>
<script src="/js/animation.js"></script>
</body>
</html>
This order matters because animation.js refers to the global values THREE, THREE.OrbitControls, pos, and idx, which are defined in the preceding files.
4. Input Data: Vertices and Triangles of the 3D Model
In the original HTML file, the model data appears directly after the b64() function as two very long Base64 strings. Three.js does not generate these strings — they are precomputed mesh coordinates stored as text so I can embed them in a single file.
The decoding function itself is:
function b64(s,T){var b=atob(s),u=new Uint8Array(b.length);for(var k=0;k<b.length;k++)u[k]=b.charCodeAt(k);return new T(u.buffer);}
The next line declares pos and idx:
var pos = b64("...encoded coordinates...", Float32Array);
var idx = b64("...encoded triangle indices...", Uint32Array);
The example shown here illustrates the syntax, not the actual content of the model data. I preserved both full Base64 strings in js/logo-data.js. I do not reproduce them here because they would take up more than 100,000 characters without helping explain the animation.
Decoding produces 2,104 vertices (6,312 Float32 coordinates) and 4,280 triangles (12,840 Uint32 indices). The model ranges in depth from -4 to 4, so it is a real three-dimensional mesh, not a flat PNG image. These numbers come directly from the file data.
5. Renderer, Scene, and Camera
At this point, I move on to animation.js. First, I connect the canvas to the renderer and configure the camera.
var canvas=document.getElementById('c');
var renderer=new THREE.WebGLRenderer({canvas:canvas,antialias:true});
renderer.setPixelRatio(Math.min(devicePixelRatio,2));
var scene=new THREE.Scene(); scene.background=new THREE.Color(0x0a0c11);
var camera=new THREE.PerspectiveCamera(35,1,0.1,4000);
I limit the pixel ratio with renderer.setPixelRatio(Math.min(devicePixelRatio,2)) to avoid placing unnecessary load on the GPU on high-DPI screens. I also set a dark background and create a perspective camera with a 35° field of view. I position it after calculating the canvas aspect ratio.
6. Sampling Points on the Surface of Any Triangle Mesh
This is the most important part of the data preparation process. I wanted to distribute 140,000 grains across the triangles of the input model and deliberately increase their density on selected surfaces in the demo. I do not sample vertices alone — I distribute particles inside the triangles as well.
// --- random + surface sampling
var rnd=(function(a){return function(){a|=0;a=a+0x6D2B79F5|0;var t=Math.imul(a^a>>>15,1|a);t=t+Math.imul(t^t>>>7,61|t)^t;return((t^t>>>14)>>>0)/4294967296;};})(12345);
var nT=idx.length/3, cum=new Float64Array(nT), nrm=new Float32Array(nT*3), tot=0;
for(var t=0;t<nT;t++){
  var a=idx[3*t]*3,b=idx[3*t+1]*3,c=idx[3*t+2]*3;
  var ux=pos[b]-pos[a],uy=pos[b+1]-pos[a+1],uz=pos[b+2]-pos[a+2],vx=pos[c]-pos[a],vy=pos[c+1]-pos[a+1],vz=pos[c+2]-pos[a+2];
  var nx=uy*vz-uz*vy,ny=uz*vx-ux*vz,nz=ux*vy-uy*vx,l=Math.hypot(nx,ny,nz)||1;
  nrm[3*t]=nx/l;nrm[3*t+1]=ny/l;nrm[3*t+2]=nz/l;
  var area=l/2; if(Math.abs(nz/l)>0.5) area*=8;   // most sand on the front/back faces
  tot+=area; cum[t]=tot;
}
var NL=140000, nOut=new Float32Array(NL*3), home=new Float32Array(NL*3), sand=new Float32Array(NL*4), rr=new Float32Array(NL);
for(var k=0;k<NL;k++){
  var r=rnd()*tot,lo=0,hi=nT-1;
  while(lo<hi){var mid=(lo+hi)>>1; if(cum[mid]<r)lo=mid+1; else hi=mid;}
  var A=idx[3*lo]*3,B=idx[3*lo+1]*3,C=idx[3*lo+2]*3;
  var s=Math.sqrt(rnd()),u=1-s,v=s*rnd(),w=1-u-v;
  var px=u*pos[A]+v*pos[B]+w*pos[C],py=u*pos[A+1]+v*pos[B+1]+w*pos[C+1],pz=u*pos[A+2]+v*pos[B+2]+w*pos[C+2];
  nOut[3*k]=nrm[3*lo];nOut[3*k+1]=nrm[3*lo+1];nOut[3*k+2]=nrm[3*lo+2];
  home[3*k]=px;home[3*k+1]=py;home[3*k+2]=pz;
  var mag=4+Math.pow(rnd(),1.6)*26;
  sand[4*k]=(nrm[3*lo]*0.8+(rnd()*2-1))*mag;
  sand[4*k+1]=(nrm[3*lo+1]*0.8+(rnd()*2-1))*mag;
  sand[4*k+2]=(nrm[3*lo+2]*0.8+(rnd()*2-1))*mag;
  sand[4*k+3]=rnd();          // dissolve delay
  rr[k]=rnd();
}
Step 1: I Calculate and Weight Triangle Areas
For every triangle, I calculate two edge vectors and then take their cross product. The length of the cross product is twice the triangle's area. I store its normalized direction as the normal vector nrm.
var nx=uy*vz-uz*vy,ny=uz*vx-ux*vz,nz=ux*vy-uy*vx,l=Math.hypot(nx,ny,nz)||1;
var area=l/2;
If a triangle faces mainly forward or backward (Math.abs(nz/l)>0.5), I multiply its weight by eight. This is a deliberate way to concentrate more sand on the front and back faces of my sample logo, not a universal requirement. For another object, I can remove that condition.
Step 2: I Select a Triangle with Binary Search
I draw a random value r between 0 and tot. Then I use lo, hi, and mid to find the triangle whose cumulative-area interval contains the sampled value. This avoids scanning all triangles separately for each of the 140,000 points.
Step 3: I Sample a Point Inside a Triangle
var s=Math.sqrt(rnd()),u=1-s,v=s*rnd(),w=1-u-v;
var px=u*pos[A]+v*pos[B]+w*pos[C];
I use barycentric coordinates. Taking the square root of the first random number lets me distribute points uniformly over the selected triangle rather than concentrating them near one vertex. This gives me the particles' initial positions.
Step 4: I Assign a Scatter Vector to Each Grain
For every particle, I store four values in the sand array: three components of its displacement vector and a random starting delay. I derive the direction from the surface normal plus a random offset, and the displacement length from the randomized mag value.
7. Uniforms, Color Selection, and Point Materials
I prepared shared values that I pass to the shaders while the animation is running.
var uTime={value:0}, uMix={value:0}, uScale={value:800};
var uEv=[],uEvC=[],uEvP=[];
var uLogo={value:new THREE.Vector3(0.969,0.98,1.0)};
(function(){
  var inp=document.getElementById('lc'),hx=document.getElementById('hx');
  function apply(h){if(!/^#[0-9a-f]{6}$/i.test(h))return;
    uLogo.value.set(parseInt(h.substr(1,2),16)/255,parseInt(h.substr(3,2),16)/255,parseInt(h.substr(5,2),16)/255);
    inp.value=h;hx.textContent=h.toUpperCase();}
  try{var sv=localStorage.getItem('dcLogoColor');if(sv)apply(sv);}catch(e){}
  inp.addEventListener('input',function(){apply(inp.value);try{localStorage.setItem('dcLogoColor',inp.value);}catch(e){}});
})();
for(var k=0;k<4;k++){uEv.push(new THREE.Vector4(0,0,1,0));uEvC.push(new THREE.Vector3());uEvP.push(new THREE.Vector3());}
var FRAG='varying float vA;varying vec3 vC;void main(){vec2 c=gl_PointCoord-0.5;float d=length(c);if(d>0.5)discard;gl_FragColor=vec4(vC,vA*smoothstep(0.5,0.15,d));}';
function pm(vs,u){return new THREE.ShaderMaterial({vertexShader:vs,fragmentShader:FRAG,uniforms:u,transparent:true,depthWrite:false,blending:THREE.AdditiveBlending});}
var FRAGL='varying vec3 vC;void main(){if(length(gl_PointCoord-0.5)>0.5)discard;gl_FragColor=vec4(vC,1.0);}';
uTime represents time, uMix controls the degree of disintegration (0 = assembled object, 1 = fully scattered), and I use uScale to adjust point size to the viewport resolution and perspective.
I store the RGB color in uLogo as a THREE.Vector3. The input event lets me change it in real time, and localStorage restores the previous selection when the page is reopened. I use try/catch to handle cases where local storage is unavailable.
For the energy effects, I created uEv, uEvC, and uEvP: four slots holding event data, colors, and impact positions. I also wrote two fragment shaders, FRAG and FRAGL, to control the appearance of the points.
8. The Object Vertex Shader — Smooth Disintegration and Reconstruction
I put the previously generated points into BufferGeometry. For each point, I retain its base position, scatter vector, random value, and surface normal. The actual movement happens later, in the vertex shader.
// --- logo sand
var gL=new THREE.BufferGeometry();
gL.setAttribute('position',new THREE.BufferAttribute(home,3));
gL.setAttribute('aSand',new THREE.BufferAttribute(sand,4));
gL.setAttribute('aRand',new THREE.BufferAttribute(rr,1));
gL.setAttribute('aN',new THREE.BufferAttribute(nOut,3));
var logoVS=`
attribute vec4 aSand;attribute float aRand;attribute vec3 aN;
uniform float uMix,uTime,uScale;uniform vec3 uLogo;uniform vec4 uEv[4];uniform vec3 uEvC[4];uniform vec3 uEvP[4];
varying vec3 vC;
float h3(vec3 p){p=fract(p*0.3183099+0.1);p*=17.0;return fract(p.x*p.y*p.z*(p.x+p.y+p.z));}
float vn(vec3 x){vec3 i=floor(x),f=fract(x);f=f*f*(3.0-2.0*f);
 return mix(mix(mix(h3(i),h3(i+vec3(1.0,0.0,0.0)),f.x),mix(h3(i+vec3(0.0,1.0,0.0)),h3(i+vec3(1.0,1.0,0.0)),f.x),f.y),
            mix(mix(h3(i+vec3(0.0,0.0,1.0)),h3(i+vec3(1.0,0.0,1.0)),f.x),mix(h3(i+vec3(0.0,1.0,1.0)),h3(i+vec3(1.0,1.0,1.0)),f.x),f.y),f.z);}
vec3 pal(float h){vec3 B=vec3(0.3,0.72,1.0),G=vec3(0.25,1.0,0.6),P=vec3(1.0,0.4,0.82);float x=fract(h)*3.0;
 return x<1.0?mix(B,G,x):(x<2.0?mix(G,P,x-1.0):mix(P,B,x-2.0));}
void main(){
 float l=clamp((uMix-aSand.w*0.55)/0.45,0.0,1.0);float e=l*l*(3.0-2.0*l);
 vec3 p=position+aSand.xyz*e;
 p+=vec3(sin(uTime*1.3+aRand*40.0),cos(uTime*1.1+aRand*31.0),sin(uTime*0.9+aRand*17.0))*1.6*e;
 float sw=e*0.25*sin(uTime*0.5+aRand*6.0);float cs=cos(sw),sn=sin(sw);p.xy=vec2(cs*p.x-sn*p.y,sn*p.x+cs*p.y);
 // thin crawling arcs (ridges of moving noise) in blue / green / pink
 vec3 q=position*0.10;
 float n1=vn(q+vec3(uTime*0.35,uTime*0.22,uTime*0.1));
 float n2=vn(q*2.3-vec3(uTime*0.5,uTime*0.3,-uTime*0.2)+7.0);
 float arc=max(pow(1.0-abs(2.0*n1-1.0),28.0),0.9*pow(1.0-abs(2.0*n2-1.0),32.0));
 arc*=0.8+0.2*sin(uTime*37.0+aRand*30.0);
 vec3 acol=pal(position.x*0.010+position.y*0.006+uTime*0.06+n2*0.25);
 acol=mix(acol,vec3(1.0),0.06+0.14*arc);
 // flare where a bolt leaves the logo
 vec3 gc=vec3(0.0);float gl=0.0;
 for(int i=0;i<4;i++){ if(uEv[i].w>0.5){float age=uTime-uEv[i].y;
  if(age>=0.0&&age<0.8){vec3 d=position-uEvP[i];float g=exp(-dot(d,d)/20.0-age*6.0);gc+=uEvC[i]*g;gl+=g;}}}
 float I=clamp(arc*2.2+gl,0.0,1.0);
 if(gl>0.001) acol=mix(acol,gc/gl,clamp(gl,0.0,1.0));
 vec4 mv=modelViewMatrix*vec4(p,1.0);gl_Position=projectionMatrix*mv;
 gl_PointSize=max(1.0,mix(0.42,0.14+aRand*0.26,e)*(1.0+1.0*I)*uScale/-mv.z);
 float sh=0.78+0.22*max(dot(normalize(normalMatrix*aN),normalize(vec3(0.3,0.5,0.8))),0.0);
 vec3 rest=uLogo*(sh/0.958)*(0.96+0.08*aRand);
 vec3 sandc=mix(vec3(0.85,0.9,1.0),vec3(1.0,0.88,0.7),fract(aRand*13.0)*0.6);
 vec3 base=mix(rest,sandc*(0.6+0.4*sh),smoothstep(0.0,0.5,e));
 vC=mix(base,acol*1.5,I);
}`;
var ptsL=new THREE.Points(gL,new THREE.ShaderMaterial({vertexShader:logoVS,fragmentShader:FRAGL,uniforms:{uTime:uTime,uMix:uMix,uScale:uScale,uEv:{value:uEv},uEvC:{value:uEvC},uEvP:{value:uEvP},uLogo:uLogo}}));
ptsL.frustumCulled=false; scene.add(ptsL);
How I Animate Disintegration and Reconstruction
I calculate an individual transformation progress value for every particle:
float l=clamp((uMix-aSand.w*0.55)/0.45,0.0,1.0);
float e=l*l*(3.0-2.0*l);
vec3 p=position+aSand.xyz*e;
The random aSand.w value makes particles begin moving at different times. I smooth the transition using the polynomial e (a smoothstep curve). When I increase uMix, grains follow their assigned vectors; when I decrease it, they return to their original positions.
I add a sinusoidal oscillation and a slight rotation in the XY plane to the displacement. This keeps the grains from moving along perfectly rigid straight lines.
How I Generated Colorful Energy Streaks on the Model
I use two independent vn() noise fields in the shader and extract narrow bands with pow(1.0-abs(2.0*n-1.0), ...). The pal() function blends blue, green, and pink. I use no textures: I calculate the colors procedurally from position and time.
How I Handle a Lightning Strike
For the four uEv entries, I check events from the previous 0.8 seconds. The distance between a point and uEvP[i], together with the event's age, determines a short-lived glow. I take the color from uEvC[i], so a strike also visibly affects the object itself.
At the end of the shader, I calculate point sizes from uScale, camera distance, the degree of disintegration, and the intensity of the glowing streaks. The rest and sand values let me blend the appearance of the assembled object with that of the scattered cloud.
9. Optional Orbital Ring Made of 22,000 Grains
I designed the ring without using a ready-made torus geometry. I assign each grain its own radius, angle, and Z offset, then calculate its current position in the shader.
// --- orbiting ring of sand: dense on the main orbit, thinning out with distance
var NR=22000, rg=new Float32Array(NR*4), R0=62;
for(var k=0;k<NR;k++){
  var d=-Math.log(1-rnd()*0.999), rad=rnd()<0.72 ? R0+d*9 : R0-Math.min(d*2.2,7);
  var z=(rnd()+rnd()+rnd()-1.5)*(2+Math.max(rad-R0,0)*0.35);
  rg[4*k]=rnd()*6.2832; rg[4*k+1]=rad; rg[4*k+2]=z; rg[4*k+3]=rnd();
}
var gR=new THREE.BufferGeometry();
gR.setAttribute('position',new THREE.BufferAttribute(new Float32Array(NR*3),3));
gR.setAttribute('aR',new THREE.BufferAttribute(rg,4));
var ringVS=`
attribute vec4 aR;uniform float uTime,uScale;uniform vec4 uEv[4];uniform vec3 uEvC[4];
varying float vA;varying vec3 vC;
void main(){
 float r=aR.y;float a=aR.x+uTime*0.16*pow(62.0/r,1.5);
 vec3 p=vec3(cos(a)*r,sin(a)*r,aR.z+sin(uTime*0.6+aR.w*50.0)*0.5);
 vec4 mv=modelViewMatrix*vec4(p,1.0);gl_Position=projectionMatrix*mv;
 float off=max(r-62.0,0.0);float f=smoothstep(0.0,45.0,off);
 float sz=(0.16+aR.w*0.3)*mix(1.0,0.6,f);
 float al=mix(0.9,0.15,f)*(0.5+0.5*fract(aR.w*7.3));
 float q=fract(aR.w*37.1);
 vec3 c=q<0.55?vec3(0.78,0.86,1.0):(q<0.85?vec3(1.0,0.86,0.62):vec3(0.55,0.72,1.0));
 vec3 ec=vec3(0.0);
 for(int i=0;i<4;i++){ if(uEv[i].w>0.5){float age=uTime-uEv[i].y;
  if(age>=0.0&&age<uEv[i].z){
   float dth=abs(mod(a-uEv[i].x+3.14159,6.28318)-3.14159);
   float life=1.0-age/uEv[i].z;
   float front=age*1.7;float xx=(dth-front)/(0.10+0.18*age);
   float wave=exp(-xx*xx);
   float core=2.0*exp(-dth*dth/0.012-age*5.0);
   float fill=smoothstep(front+0.05,front-0.25,dth)*0.3*life;
   ec+=uEvC[i]*(wave*life*life+core+fill)*(1.0-0.5*f);
  }}}
 float bI=clamp(length(ec),0.0,1.6);
 vec3 hue=ec/(bI+0.001);float k2=clamp(bI,0.0,1.0);vC=mix(c,hue*0.9,k2);vA=min(1.0,al+0.3*k2);sz*=1.0+bI*0.5;
 gl_PointSize=max(1.0,sz*uScale/-mv.z);
}`;
var ptsR=new THREE.Points(gR,pm(ringVS,{uTime:uTime,uScale:uScale,uEv:{value:uEv},uEvC:{value:uEvC}}));
ptsR.frustumCulled=false; scene.add(ptsR);
I generate the radial distribution using -Math.log(1-rnd()*0.999). I concentrate most points near R0=62 while leaving a diffuse outer halo. About 72% of the grains are placed on the outer side of the main orbit.
I calculate the rotation angle in the shader:
float a=aR.x+uTime*0.16*pow(62.0/r,1.5);
I link the orbital speed to the radius: grains closer to the center rotate differently from those farther away. This is a stylized orbital motion, not a full gravitational simulation.
An Energy Wave Traveling Along the Ring
When a lightning bolt strikes the ring, I activate one of the four uEv slots. For each grain, I calculate the angular distance dth from the impact location. The value front=age*1.7, which grows with the age of the event, represents the traveling energy wave.
float wave=exp(-xx*xx);
float core=2.0*exp(-dth*dth/0.012-age*5.0);
The wave variable illuminates a narrow band moving around the orbit, while core creates a stronger flash at the point of impact. I also change the color vC, opacity vA, and size sz so the pulse remains visible across the ring.
10. Background Stars
To keep the scene from ending in a flat, dark background, I added 1,400 subtle stars positioned far from the camera.
// --- faint background stars
var ns=1400, sp=new Float32Array(ns*3);
for(var k=0;k<ns;k++){var th=rnd()*6.2832,ph=Math.acos(2*rnd()-1),R=900+rnd()*300;
  sp[3*k]=R*Math.sin(ph)*Math.cos(th);sp[3*k+1]=R*Math.sin(ph)*Math.sin(th);sp[3*k+2]=R*Math.cos(ph);}
var gS=new THREE.BufferGeometry();gS.setAttribute('position',new THREE.BufferAttribute(sp,3));
scene.add(new THREE.Points(gS,new THREE.PointsMaterial({color:0x8d96a8,size:1.4,sizeAttenuation:false,transparent:true,opacity:0.6})));
I use spherical coordinates (th, ph) to place points around the object. A radius of 900–1,200 units keeps them in the background. The PointsMaterial makes the stars stationary, semi-transparent, and understated.
11. Lightning Bolts Connecting the Demo Object to the Ring
I built the lightning differently from a typical LineSegments implementation: I generate densely spaced points along jagged paths. I draw each point in two layers — a bright core and a colored glow.
// --- lightning bolts: leave the logo edge, strike the ring, discharge spreads along it
var PAL=[[0.35,0.75,1.0],[0.3,1.0,0.65],[1.0,0.45,0.85]], SL=4, BP=SL*2*260;
var bPos=new Float32Array(BP*3), bCol=new Float32Array(BP*3), bSz=new Float32Array(BP);
var bG=new THREE.BufferGeometry();
bG.setAttribute('position',new THREE.BufferAttribute(bPos,3));
bG.setAttribute('aC',new THREE.BufferAttribute(bCol,3));
bG.setAttribute('aS',new THREE.BufferAttribute(bSz,1));
var bMat=new THREE.ShaderMaterial({uniforms:{uScale:uScale},transparent:true,depthWrite:false,blending:THREE.AdditiveBlending,
  vertexShader:'attribute vec3 aC;attribute float aS;uniform float uScale;varying vec3 vC;void main(){vec4 mv=modelViewMatrix*vec4(position,1.0);gl_Position=projectionMatrix*mv;gl_PointSize=max(1.0,aS*uScale/-mv.z);vC=aC;}',
  fragmentShader:'varying vec3 vC;void main(){float d=length(gl_PointCoord-0.5);if(d>0.5)discard;gl_FragColor=vec4(vC*smoothstep(0.5,0.0,d),1.0);}'});
var bolts=new THREE.Points(bG,bMat); bolts.frustumCulled=false; scene.add(bolts);
var slotPath=[null,null,null,null], nextEv=1.0, evCount=0, frame=0;
function jag(p0,p1,n,amp){
  var pts=[],dx=p1.x-p0.x,dy=p1.y-p0.y,dz=p1.z-p0.z,L=Math.hypot(dx,dy)||1,px=-dy/L,py=dx/L;
  for(var i=0;i<=n;i++){var f=i/n,e=Math.sin(Math.PI*f),j=(Math.random()*2-1)*amp*e,jz=(Math.random()*2-1)*amp*0.5*e;
    pts.push(new THREE.Vector3(p0.x+dx*f+px*j,p0.y+dy*f+py*j,p0.z+dz*f+jz));}
  return pts;
}
function spawn(t){
  var slot=-1;for(var k=0;k<SL;k++){if(uEv[k].w<0.5||t-uEv[k].y>uEv[k].z){slot=k;break;}}
  if(slot<0)slot=evCount%SL; evCount++;
  var th=Math.random()*6.2832,c=Math.cos(th),s=Math.sin(th),er=1/Math.hypot(c/49,s/43.8);
  var sp=new THREE.Vector3(c*er*0.96,s*er*0.96,(Math.random()-0.5)*6), pc=PAL[Math.floor(Math.random()*3)];
  uEv[slot].set(th,t,2.4,1); uEvC[slot].set(pc[0],pc[1],pc[2]); uEvP[slot].copy(sp);
  var ta=th+(Math.random()-0.5)*0.06;
  slotPath[slot]={th:th,start:sp,pts:null,end:new THREE.Vector3(Math.cos(ta)*62.5,Math.sin(ta)*62.5,(Math.random()-0.5)*3)};
}
function updateBolts(t){
  frame++;
  if(t>nextEv){spawn(t);nextEv=t+0.5+Math.random()*1.8;}
  bCol.fill(0); bSz.fill(0); var pi=0;
  for(var k=0;k<SL;k++){
    var P=slotPath[k]; if(!P||uEv[k].w<0.5)continue;
    var age=t-uEv[k].y; if(age<0||age>0.45)continue;
    if(!P.pts||frame%3===0){
      var main=jag(P.start,P.end,12,5),list=[main];
      [4,8].forEach(function(ix){var o=main[ix],a2=P.th+(Math.random()<0.5?-1:1)*0.5;
        list.push(jag(o,new THREE.Vector3(o.x+Math.cos(a2)*7,o.y+Math.sin(a2)*7,o.z+(Math.random()-0.5)*4),5,2));});
      P.pts=list;
    }
    var life=Math.pow(1-age/0.45,1.3)*(0.65+0.35*Math.random()), col=uEvC[k];
    for(var li=0;li<P.pts.length;li++){var pl=P.pts[li];
      for(var i=0;i<pl.length-1;i++){
        var a=pl[i],b=pl[i+1],len=a.distanceTo(b),n=Math.max(1,Math.ceil(len/0.45));
        for(var j=0;j<n&&pi<BP-2;j++){
          var f=j/n,x=a.x+(b.x-a.x)*f,y=a.y+(b.y-a.y)*f,z=a.z+(b.z-a.z)*f;
          for(var q=0;q<2;q++,pi++){          // q=0 white core, q=1 coloured halo
            bPos[3*pi]=x;bPos[3*pi+1]=y;bPos[3*pi+2]=z;
            if(q===0){bCol[3*pi]=bCol[3*pi+1]=bCol[3*pi+2]=0.55*life;bSz[pi]=0.6;}
            else{bCol[3*pi]=col.x*0.5*life;bCol[3*pi+1]=col.y*0.5*life;bCol[3*pi+2]=col.z*0.5*life;bSz[pi]=2.0;}
          }
        }}}
  }
  bG.attributes.position.needsUpdate=true; bG.attributes.aC.needsUpdate=true; bG.attributes.aS.needsUpdate=true;
}
Buffers and Four Effect Slots
SL=4 is the number of concurrent event slots I chose. BP=SL*2*260 reserves 2,080 points for lightning cores and halos. I use bPos, bCol, and bSz to store their positions, colors, and sizes.
The jag() Function — A Jagged Path
function jag(p0,p1,n,amp){
  var pts=[],dx=p1.x-p0.x,dy=p1.y-p0.y,dz=p1.z-p0.z,L=Math.hypot(dx,dy)||1,px=-dy/L,py=dx/L;
  for(var i=0;i<=n;i++){
    var f=i/n,e=Math.sin(Math.PI*f),j=(Math.random()*2-1)*amp*e,jz=(Math.random()*2-1)*amp*0.5*e;
    pts.push(new THREE.Vector3(p0.x+dx*f+px*j,p0.y+dy*f+py*j,p0.z+dz*f+jz));
  }
  return pts;
}
This fragment illustrates the essential idea behind my jag() function, whose full source I also included in the code block above. I generate points from the start to the end of the path and introduce random sideways offsets to create an irregular electrical discharge.
spawn() — Creating a New Strike
In spawn(), I look for an available slot, choose a starting point near the edge of my sample logo, and an endpoint on the ring. I store the impact angle th in uEv so the ring shader can trigger a wave at the correct location.
updateBolts() — The Lifetime of a Discharge
I introduce a random interval of approximately 0.5–2.3 seconds between strikes. A bright bolt remains visible for no more than 0.45 seconds, but its energy trail can affect the ring for longer.
Every third frame, I rebuild the discharge geometry. The main path has 12 segments, and two additional branches start at selected positions. I sample each segment into densely packed points to create the appearance of a thin, glowing line.
12. How I Configured the Camera and OrbitControls
Finally, I configured the camera controls.
// --- camera + controls
function size(){var w=canvas.clientWidth,h=canvas.clientHeight;renderer.setSize(w,h,false);camera.aspect=w/h;camera.updateProjectionMatrix();
  uScale.value=renderer.domElement.height/(2*Math.tan(THREE.MathUtils.degToRad(17.5)));}
size(); addEventListener('resize',size);
var dist=Math.max(230,240/camera.aspect);
camera.position.set(0,-0.3*dist,dist);
var controls=new THREE.OrbitControls(camera,canvas);
controls.enableDamping=true;controls.dampingFactor=0.12;
controls.minDistance=60;controls.maxDistance=600;
In the size() function, I adapt the renderer and camera aspect ratio to the canvas dimensions. I use uScale to recalculate perspective-correct point sizes so they retain a suitable scale across different screens.
I made the initial camera distance depend on a minimum of 230 units and the screen aspect ratio. In OrbitControls, I enabled rotation, zoom, and movement damping (enableDamping, dampingFactor=0.12) for smooth interaction.
13. How I Linked Object Disintegration to Camera Movement
This is where I connected user interaction to the entire particle system.
// --- loop: moving the view -> sand, still view -> solid logo
var clock=new THREE.Clock(), prev=camera.position.clone(), lastMove=-9, mix=0;
function sstep(a,b,x){x=Math.min(1,Math.max(0,(x-a)/(b-a)));return x*x*(3-2*x);}
(function loop(){
  requestAnimationFrame(loop);
  var dt=Math.min(clock.getDelta(),0.05), t=clock.elapsedTime;
  controls.update();
  if(camera.position.distanceTo(prev)>0.04) lastMove=t;
  prev.copy(camera.position);
  var target=(t-lastMove<0.3)?1:0, d=target-mix;
  mix+=d*(1-Math.exp(-dt*(target?6:2.2)))+Math.sign(d)*0.12*dt;
  if(Math.abs(target-mix)<0.01) mix=target;
  mix=Math.min(1,Math.max(0,mix));
  uMix.value=mix; uTime.value=t; updateBolts(t);
  renderer.render(scene,camera);
})();
I perform the following steps in each frame:
controls.update()updates the camera position, including damping.- When the camera moves more than
0.04units since the previous frame, I record the current time inlastMove. - If less than
0.3seconds have passed since the last movement, I settarget=1(disintegration). Otherwise, I settarget=0(reconstruction). - I smoothly move
mixtowardtarget: the6coefficient produces faster scattering, while2.2gives me a slower reassembly. - I pass the current values to the
uMixanduTimeuniforms. - I call
updateBolts(t)and render the next frame withrenderer.render(scene,camera).
The key instruction is uMix.value=mix: I control the transformation of all 140,000 GPU particles with a single number. This is why camera movement can scatter the model smoothly, while stopping the view triggers its reconstruction.
14. How to Replace the Model and Customize the Animation
| Setting | Original value | Purpose |
|---|---|---|
NL |
140000 | Number of surface points on the logo |
NR |
22000 | Number of particles in the ring |
R0 |
62 | Main orbital radius |
ns |
1400 | Number of background stars |
SL |
4 | Number of lightning event slots |
BP |
2080 | Capacity of the lightning point buffer |
uLogo |
#F7FAFF (in the color picker) |
Default color of the assembled logo |
dampingFactor |
0.12 | Camera rotation damping |
minDistance / maxDistance |
60 / 600 | Zoom range |
target?6:2.2 |
6 / 2.2 | Disintegration / reconstruction speed |
To use a different model, I replace pos and idx with the vertex coordinates and triangle indices of the new mesh. I do not need to change the sampling procedure, although I do adjust parameters that depend on the object's scale and shape.
Performance
The biggest one-time CPU cost occurs when I generate the 140,000 points. Afterward, the shader computes their motion. The 22,000 ring particles, lightning effects, and scene rendering add further load, so I can reduce these numbers on less powerful hardware.
How I Substitute the Geometry of Another 3D Object
My algorithm relies on two arrays: pos with XYZ coordinates and idx with triangle indices. The input mesh does not have to depict a logo. I can provide any suitably prepared triangulated geometry.
function geometryToArrays(geometry) {
  const attribute = geometry.getAttribute('position');
  if (!attribute || attribute.itemSize !== 3) {
    throw new Error('Model must have an XYZ position attribute');
  }
  const pos = Float32Array.from(attribute.array);
  const idx = geometry.index
    ? Uint32Array.from(geometry.index.array)
    : Uint32Array.from({ length: attribute.count }, (_, i) => i);
  if (idx.length % 3 !== 0) {
    throw new Error('Geometry must contain triangles');
  }
  return { pos, idx };
}

// After loading or creating your own BufferGeometry:
const data = geometryToArrays(myGeometry);
var pos = data.pos;
var idx = data.idx;
When I use a GLTF/GLB or OBJ model, I first load it with the appropriate loader and obtain its BufferGeometry. If the model contains multiple Mesh objects, I need to account for their transforms or merge the geometries before sampling.
What do I adjust after switching models?
- Scale and center — I recalculate
mag=4+...*26, the camera position, and point sizes based on the new geometry. - Grain distribution — I remove
if(Math.abs(nz/l)>0.5) area*=8if I want surface-area-weighted coverage without the custom front/back weighting. - Ring and lightning — I adjust
R0=62, the62.5value, and the elliptical strike starting points calculated using49and43.8, because I tuned them for the demo logo. - Animation trigger — I can keep camera movement or control
uMixthrough scrolling, clicking, a slider, or a GSAP animation.
The underlying disintegration math remains unchanged. Once I prepare new particle positions and displacement vectors, the shader continues interpolating between the solid shape and the scattered cloud.
15. Real-World Applications of This Universal Effect
I see many possible uses: an interactive hero section, a portfolio intro, product animation, architectural presentation, or a materialization effect in a science-fiction project. I can link disintegration to page scrolling, user gestures, or a change in the application state. If I wanted a seamless transition between two different models, I would also need to map particles between their geometries — the current script restores one original shape.
16. Download


17. Conclusion
In this project, I combined 3D geometry, statistical surface sampling, Float32Array buffers, camera control through OrbitControls, GLSL shaders, and procedural effects. My most important decision was to separate CPU-based data preparation from GPU-based animation: that lets me control a large number of grains with one parameter.
I do not play back a video or a pre-rendered animated texture. I created a 3D model that breaks apart into 140,000 points and reconstructs its shape in response to user movement. I added an orbital ring and lightning bolts to the demonstration, but I designed the underlying method for a variety of 3D meshes.
Complete source code: in the threejs-sand-logo.zip archive, I included all scripts, the actual sample model data, and the libraries. The index.html file works offline.

Paweł Nosko
Paweł Nosko — a developer and founder of Design Cart, active in the IT industry since 2009 and focused on e-commerce since 2011. He specializes in building online stores and advanced product configurators. He has delivered over 100 projects, working with platforms such as OpenCart, PrestaShop, Magento, and WooCommerce. He combines technical expertise with a business mindset — his solutions don’t just work, they sell. On his blog, he shares practical insights, tests, and analysis of e-commerce tools — no theory, just real experience.