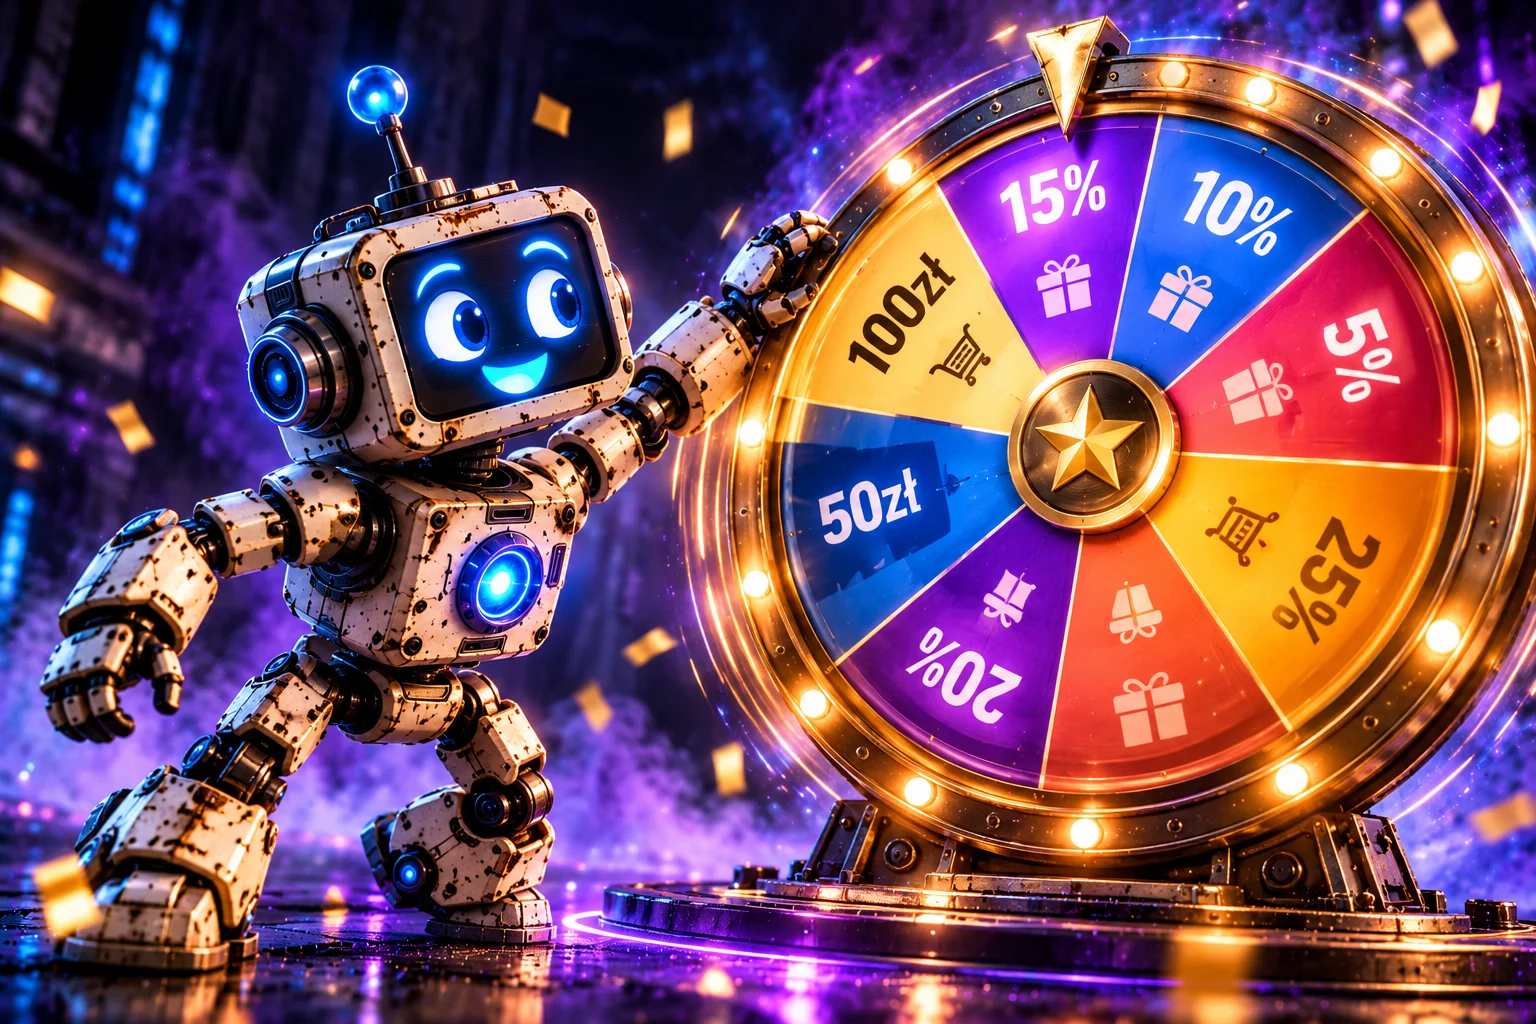
Recently, I was looking for a solution to make their calls to action more attractive... you know... before Christmas, all online stores compete with each other incredibly fiercely. Promotions alone won't attract customers because, after all, the entire internet is one big promotion. I thought about getting customers more involved and drawing them into a bit of fun. I came up with the idea of a popup with a spinning wheel for drawing discounts, something called “Spin to Win”. The internet is surprisingly limited when it comes to ready-made scripts of this kind. So I wrote my own, and that's exactly what today's tutorial is about. Let's get started.

What Will We Need?
Let's start with the fact that I have no intention of building another huge marketing application that requires creating an account, configuring external services, and paying a subscription.
I want to create a small, independent script that can be embedded on practically any website. Ideally, one that I can later turn into a module for WooCommerce, OpenCart, or PrestaShop without too much trouble.
Our assumptions are simple. After opening the page, the user will see a popup with a prize wheel. They will be able to grab it with a mouse or finger, spin it, and draw one of the available prizes. The wheel should behave naturally, slow down smoothly, and display information about the prize after stopping.
I also want the store administrator to be able to define the prizes and their probabilities of being drawn.
We will use the following technologies:
| Technology | Purpose |
|---|---|
| HTML5 | Popup structure, buttons, and prize notification |
| CSS3 | Popup appearance, responsiveness, and interface animations |
| JavaScript | Wheel control, event handling, and prize selection |
| Three.js | Generating the 3D scene, materials, and lighting |
| Canvas 2D | Dynamically drawing colored segments and discount descriptions |
| JSON | Storing prize configuration |
We won't need PHP, a database, or any frontend framework.
At this stage, we're creating a standalone visual mechanism. In future e-commerce applications, a backend will obviously be needed to securely issue coupons, control the number of spins, and save results.
Why Did I Choose Three.js Instead of Pure CSS?
Of course, a prize wheel can be created using HTML and CSS alone. All you need is a properly prepared element, conic-gradient(), and a transform: rotate() animation.
Such a solution would be simpler, but I wanted to achieve something more.
I wanted the wheel to have a three-dimensional appearance, a metallic casing, light reflections, animated bulbs, and a subtle tilt of the entire structure when moving the cursor.
That's why I decided to use Three.js, a JavaScript library that allows us to render 3D graphics in the browser using WebGL.
In our project, Three.js is responsible for several elements:
-
the three-dimensional wheel body and its metallic frame;
-
the central hub and the pointer indicating the winning segment;
-
24 animated bulbs arranged around the wheel;
-
scene lighting and reflections on materials;
-
wheel rotation and perspective changes.
Interestingly, we'll prepare the colorful wheel face with discounts using Canvas 2D, and then use it as a texture on a 3D object.
This combination has an important advantage. We don't need to create separate models for each number of prizes. JavaScript will automatically draw the appropriate number of wheel segments, place labels on them, and pass the finished texture to Three.js.
We include the library from a CDN:
<script src="https://cdnjs.cloudflare.com/ajax/libs/three.js/r128/three.min.js"></script>In this example, I'm using version r128 because that's the version the script was developed with. When updating to newer Three.js releases, changes to the library's API must be taken into account.
Why Do We Store Discount Configuration in JSON?
This is one of the more important decisions concerning the architecture of our solution.
I could enter all discounts directly into JavaScript and then reference them in individual functions. But why would I?
Today, we're building a standalone script. Tomorrow, we might want to turn it into a module for WooCommerce, OpenCart, or PrestaShop.
In that case, prizes won't necessarily come from a static file. They could be retrieved from module settings, generated in PHP, or returned by an API.
JSON allows us to separate the data from the wheel's display mechanism.
In my example, the configuration looks like this:
<script type="application/json" id="prizes">
[
  {"name":"off your order","amount":"5%"},
  {"name":"off your cart","amount":"10%"},
  {"name":"off your order","amount":"15%"},
  {"name":"discount","amount":"$20"},
  {"name":"off your order","amount":"20%"},
  {"name":"discount","amount":"$50"},
  {"name":"off your cart","amount":"25%"},
  {"name":"discount","amount":"$100"}
]
</script>
Each prize has two basic parameters:
-
name– an additional description displayed on the wheel segment and in the prize notification; -
amount– the main prize value, such as 10%, $50, or another text value.
We can also add a third parameter: weight, which determines the drawing weight.
For example:
[
  {"name":"discount","amount":"5%","weight":40},
  {"name":"discount","amount":"10%","weight":30},
  {"name":"discount","amount":"15%","weight":20},
  {"name":"discount","amount":"20%","weight":10}
]
In this case, the sum of the weights is 100. This means that when using the default drawing mechanism, the chances of receiving the individual discounts are 40%, 30%, 20%, and 10%, respectively.
However, we don't have to limit ourselves to a total of 100. The script treats weights as relative values.
There's one more thing worth noticing: visually, all wheel segments remain the same size. The weights affect the drawing mechanism, not the geometry of the wheel face. If we implement such a solution in a real store, the rules for awarding prizes should be clearly presented to users.
How Will We Use JSON in a Future E-commerce Module?
Let's imagine a module for OpenCart.
In the administration panel, we add prizes, set their values, optionally link them to discount coupons, and define the drawing rules.
The PHP controller retrieves the configuration and passes it to the view as JSON. Our script doesn't need to know where the data comes from. All it cares about is its structure.
We can do something similar in WooCommerce by retrieving information from our plugin's settings or an appropriate endpoint.
That's exactly why I prepared this method from the very beginning:
SpinWheel.load(json);It allows us to load a new wheel configuration at any time.
We don't have to rebuild the geometry manually. After calling this method, the script will automatically prepare the wheel face based on the supplied prize list.
Of course, JSON describing a discount is not yet an actual store coupon. Issuing and validating it must be handled separately on the server side.
HTML Structure – Preparing the Popup with the Prize Wheel
Let's move on to the actual code.
I've divided our structure into three basic elements: the button that opens the popup, the modal window containing the wheel, and the layer informing the user about their prize.
<button class="open" id="openBtn" type="button">
  Open popup
</button>

<div class="overlay" id="overlay"
     role="dialog"
     aria-modal="true"
     aria-label="Spin to win">

  <div class="modal">

    <button class="x" id="closeBtn"
            type="button"
            aria-label="Close">×</button>

    <h1>SPIN TO WIN</h1>

    <p class="sub">
      Grab the wheel and spin to win a discount.
    </p>

    <div id="stage"></div>

    <div class="win" id="win" hidden>
      <div class="card" role="alert">

        <p class="lead">
          🎉 Congratulations! You won:
        </p>

        <p class="big" id="winAmount"></p>
        <p class="name" id="winName"></p>

        <button class="claim"
                id="claimBtn"
                type="button">
          Claim it
        </button>

      </div>
    </div>

  </div>
</div>
Pay attention to this element:
<div id="stage"></div>This is where our three-dimensional wheel will appear. We don't place any static image or ready-made HTML element inside it.
Three.js will automatically create a canvas element and append it to the container.
Another important element is:
<div class="win" id="win" hidden>This is the layer containing the prize notification. Initially, it's hidden using the hidden attribute. Only after the drawing is complete will JavaScript fill the winAmount and winName fields and display the message.
Thanks to this separation, we can independently modify the appearance of the popup, the wheel itself, and the winner screen.
In the example, I also used basic accessibility attributes such as role="dialog", aria-modal, and role="alert". When creating a complete production version, it's worth extending the modal mechanism with a focus trap, focus restoration after closing, and proper keyboard navigation support.
CSS – Popup Appearance and Mobile Responsiveness
I'm not going to discuss every CSS declaration individually because most of them are responsible for colors, spacing, rounded corners, and shadows.
I'll focus on the elements that matter for the operation of the entire interface.
The first is the layer covering the page:
.overlay {
  position: fixed;
  inset: 0;
  display: grid;
  place-items: center;
  background: rgba(8,4,20,.72);
  padding: 16px;
  overflow: auto;
}

.overlay[hidden] {
  display: none;
}
Thanks to position: fixed and inset: 0, the layer occupies the entire screen. display: grid together with place-items: center allows us to center the modal window.
The second important part is the 3D scene container:
#stage {
  width: 100%;
  aspect-ratio: 1/1.06;
  margin-top: 4px;
  touch-action: none;
  cursor: grab;
  user-select: none;
}

#stage.grabbing {
  cursor: grabbing;
}

#stage.busy {
  cursor: default;
}

#stage canvas {
  display: block;
  width: 100%;
  height: 100%;
}
The most important declaration here is touch-action: none.
It informs the browser that gestures performed on this element will be handled by our script. Without it, moving a finger across the wheel on a smartphone could trigger page scrolling instead of rotating the wheel face.
Meanwhile, aspect-ratio allows us to maintain the correct proportions of the scene regardless of screen width.
In the complete code, you'll also find support for light and dark themes, as well as the prefers-reduced-motion setting, which limits the animation of the prize card appearing.
JavaScript – Building the Three-Dimensional Prize Wheel
Now we move on to the most interesting part: the mechanism responsible for generating the wheel, animating it, and drawing discounts.
1. Initializing Three.js and the 3D Scene
First, we create the renderer, scene, and camera.
const renderer = new THREE.WebGLRenderer({
  antialias: true,
  alpha: true
});

renderer.setPixelRatio(
  Math.min(window.devicePixelRatio || 1, 2)
);

renderer.outputEncoding = THREE.sRGBEncoding;

stage.appendChild(renderer.domElement);

const scene = new THREE.Scene();

const camera = new THREE.PerspectiveCamera(
  32, 1, .1, 60
);

camera.position.set(0, .3, 9.8);
WebGLRenderer is responsible for rendering the entire image. I've enabled edge smoothing and background transparency.
Notice that devicePixelRatio is limited to 2. This prevents devices with very high pixel-density screens from rendering the scene at an unnecessarily high resolution.
The perspective camera is positioned so that the user sees the wheel almost from the front but can still perceive its three-dimensional construction.
Next, we add three light sources:
scene.add(
  new THREE.AmbientLight(0xffffff, .8)
);

const key = new THREE.DirectionalLight(
  0xffffff, .7
);

key.position.set(3, 5, 8);
scene.add(key);

const warm = new THREE.PointLight(
  0xffd9a0, .6, 30
);

warm.position.set(-4, 2, 7);
scene.add(warm);
Ambient light brightens the entire structure, directional light emphasizes the geometry, and point light adds a warm reflection.
2. Creating the Body, Rim, and Wheel Lighting
We don't need external 3D models. All structural elements are generated directly using the geometries available in Three.js.
We create the base as a cylinder:
const body = new THREE.Mesh(
  new THREE.CylinderGeometry(
    2.02, 2.02, .4, 64
  ).rotateX(Math.PI / 2),
  dark
);

root.add(body);
The outer rim is created using a torus:
const rim = new THREE.Mesh(
  new THREE.TorusGeometry(1.92, .12, 20, 96),
  dark
);

rim.position.z = .2;
root.add(rim);
Next, we arrange 24 bulbs around the structure.
const bulbs = [];

for (let k = 0; k < 24; k++) {
  const m = gold();

  const b = new THREE.Mesh(
    new THREE.SphereGeometry(.07, 16, 12),
    m
  );

  const t = k / 24 * TAU;

  b.position.set(
    Math.sin(t) * 1.92,
    Math.cos(t) * 1.92,
    .3
  );

  root.add(b);
  bulbs.push(m);
}
Here, we use the trigonometric functions sin() and cos().
We divide a full rotation into 24 equal parts and then calculate the coordinates of each bulb on a circle with a radius of 1.92 units.
This allows us to arrange elements around the circumference without manually entering their positions.
3. The buildFace() Function – Dynamically Generating the Wheel Face with Discounts
This is one of the most important parts of the entire project.
Instead of preparing an image with eight prizes, we generate it dynamically.
Thanks to this, we can have four, six, eight, or any other number of segments without having to edit a graphic file.
The function begins by creating a Canvas area:
function buildFace() {
  const S = 1024;
  const R = S / 2;

  const c = document.createElement("canvas");

  c.width = c.height = S;

  const g = c.getContext("2d");
  const n = prizes.length;
  const a = TAU / n;

  g.translate(R, R);
The variable S determines the resolution of the generated texture, while R represents its radius.
TAU is a full angle, meaning 2 * Math.PI. Dividing it by the number of prizes gives us the angle of a single sector.
For eight prizes, this will be 45 degrees.
Next, we iterate through the discount list:
prizes.forEach((p, i) => {
  const col = colorOf(i, n);
  const s = -Math.PI / 2 + (i - .5) * a;

  g.beginPath();
  g.moveTo(0, 0);
  g.arc(0, 0, R, s, s + a);
  g.closePath();

  g.fillStyle = col.bg;
  g.fill();

  g.lineWidth = 5;
  g.strokeStyle = "rgba(255,255,255,.9)";
  g.stroke();
});
Each segment receives a color from a previously prepared palette.
The complete function also includes a mechanism for drawing descriptions and automatically adjusting the font size to the available space.
After drawing all segments, a texture is created:
const t = new THREE.CanvasTexture(c);

t.encoding = THREE.sRGBEncoding;

t.anisotropy =
  renderer.capabilities.getMaxAnisotropy();

return t;
And this is the texture we apply to the 3D object.
As a result, we get a wheel face that looks like an integral part of our three-dimensional wheel, even though its content was drawn using ordinary Canvas 2D.
4. The build() Function – Assembling the Finished Wheel
The build() function is responsible for placing the generated wheel face on the scene and adding markers between the segments.
function build() {
  if (faceMesh) {
    faceMesh.material.map.dispose();
    wheel.remove(faceMesh);
  }

  if (pegs) {
    wheel.remove(pegs);
  }

  if (!prizes.length) return;

  faceMesh = new THREE.Mesh(
    new THREE.CircleGeometry(1.8, 96),
    new THREE.MeshBasicMaterial({
      map: buildFace()
    })
  );

  faceMesh.position.z = .21;
  wheel.add(faceMesh);

  // Next, we create the segment markers.
}
Notice the removal of the previous texture.
This is necessary because we may want to change the number of discounts in the future using SpinWheel.load().
If we created new textures every time without releasing previous resources, we could unnecessarily increase memory usage.
5. The pickWinner() Function – How Do We Draw a Winner?
Now we need to determine which segment the wheel will stop on.
In my solution, the draw does not involve randomly stopping the animation.
First, we select the winning prize, and then calculate the rotation of the wheel face so that the pointer stops on the correct sector.
The following function is responsible for this:
function pickWinner() {
  if (typeof api.pickWinner === "function") {
    const r = api.pickWinner(prizes);

    if (
      Number.isInteger(r) &&
      r >= 0 &&
      r < prizes.length
    ) {
      return r;
    }
  }

  const w = prizes.map(
    p => p.weight > 0 ? p.weight : 1
  );

  const sum = w.reduce(
    (x, y) => x + y, 0
  );

  let r = Math.random() * sum;

  for (let i = 0; i < w.length; i++) {
    r -= w[i];

    if (r <= 0) return i;
  }

  return w.length - 1;
}
First, we check whether an external api.pickWinner() function has been defined.
If so, we can use it to indicate the winning prize.
Otherwise, the script performs a weighted draw using the weight values. For prizes without a positive weight, it assumes a default value of 1.
This is a very useful mechanism in the context of future integration with e-commerce modules.
However, it's worth distinguishing two things. The pickWinner() function itself works synchronously in the browser, so it's not enough to connect an ordinary asynchronous fetch() function and expect the script to wait for a server response.
In a production store, we can, for example, retrieve a previously approved result from the backend and then pass its index to the animation mechanism.
The browser should then be responsible for presenting the result, not independently granting an actual discount.
6. The startSpin() Function – Starting the Wheel Rotation
Now that we know the winner, we still need to make the wheel spin impressively.
function startSpin(v) {
  if (!prizes.length || mode === "spin") return;

  const n = prizes.length;
  const a = TAU / n;

  const dir = v < 0 ? -1 : 1;

  const speed = Math.min(
    Math.max(Math.abs(v), 6),
    24
  );

  const target = pickWinner();

  const base =
    -target * a +
    (Math.random() - .5) * a * .6;

  const minD = Math.max(
    TAU * 3,
    speed * 1.1
  );

  const r0 = rot;

  const k = dir > 0
    ? Math.ceil((r0 + minD - base) / TAU)
    : Math.floor((r0 - minD - base) / TAU);

  const rf = base + k * TAU;

  const D = Math.abs(rf - r0);

  const T = Math.min(
    Math.max(4 * D / speed, 4.5),
    8
  );

  anim = {
    r0,
    rf,
    t0: performance.now(),
    T: T * 1000,
    target
  };

  mode = "spin";

  stage.classList.add("busy");
  stage.classList.remove("grabbing");
}
What are we doing here?
First, we check whether the wheel is already spinning. Then we determine its direction and speed.
target stores the index of the previously selected prize.
base determines the stopping angle corresponding to that sector. An additional random component ensures that the pointer does not stop exactly in the middle of the segment every time.
Meanwhile, minD ensures a minimum number of rotations.
We also calculate the target angle rf and animation duration T, which in this case is limited to a range of 4.5 to 8 seconds.
Thanks to this, regardless of how hard the user spins the wheel, we obtain a controlled visual effect.
7. Mouse and Touchscreen Support
I didn't want to limit interaction to simply clicking a "Spin" button.
I wanted the user to actually be able to grab the wheel, drag it, and give it some speed.
So I used Pointer Events, which allow us to handle mouse, touch, and other pointing devices through a common mechanism.
First, we register the beginning of a gesture:
stage.addEventListener("pointerdown", e => {
  if (
    mode === "spin" ||
    mode === "done" && !win.hidden
  ) return;

  const c = center();

  drag = {
    c,
    last: ang(e, c),
    x0: e.clientX,
    y0: e.clientY,
    moved: 0,
    s: [{
      t: performance.now(),
      r: rot
    }]
  };

  mode = "drag";

  stage.classList.add("grabbing");
  stage.setPointerCapture(e.pointerId);
});
The center() function determines the position of the wheel's center on the screen, while ang() calculates the cursor's angle relative to that center.
As the pointer moves, we update the rotation of the wheel face and record the latest time and angle measurements.
When the user releases the mouse button or lifts their finger off the screen, the release() function is called:
function release() {
  if (mode !== "drag" || !drag) return;

  const s = drag.s;
  const f = s[0];
  const l = s[s.length - 1];

  const dt = (l.t - f.t) / 1000;

  let v = dt > 0
    ? (l.r - f.r) / dt
    : 0;

  if (drag.moved < 6) v = 10;

  drag = null;
  mode = "idle";

  startSpin(v || 10);
}
Here, we calculate angular velocity based on the change in angle over time.
If the user simply clicked the wheel without noticeably moving the cursor, we assume a default speed.
This way, the wheel can be spun using either a gesture or a simple click.
8. The loop() Function – Animation, Deceleration, and Lighting Effects
In Three.js, the scene must be rendered regularly so we can observe changes in its position.
This is handled by the loop() function, which uses requestAnimationFrame().
The most important part concerns the rotation animation:
if (mode === "spin" && anim) {
  const t = (now - anim.t0) / anim.T;

  if (t >= 1) {
    rot = anim.rf;
    mode = "finish";
    finish();
  } else {
    rot = anim.r0 +
      (anim.rf - anim.r0) *
      (1 - Math.pow(1 - t, 4));
  }
}
Here, I used an ease-out easing function.
At the beginning, the movement is fast, but as time passes, it gradually slows down. Near the end of the animation, the wheel very gently reaches its previously calculated position.
The effect is much more pleasant than rotating at a constant speed and stopping abruptly.
In the same loop, we also update the bulbs' illumination:
const sec = (now - clock) / 1000;

const ph = Math.floor(
  sec * (mode === "spin" ? 14 : 3)
);

bulbs.forEach((m, k) => {
  const on = (k + ph) % 2 === 0;

  m.emissive.setHex(
    on ? 0xff9a00 : 0x1a0f00
  );
});
When the wheel is not spinning, the lights change calmly. During the draw, the animation speeds up.
Additionally, the entire structure subtly responds to cursor movement by changing the rotation of the root group around the X and Y axes.
9. The finish() Function – Displaying the Winning Prize
When the animation ends, we call the finish() function.
function finish() {
  const p = prizes[anim.target];

  mode = "done";

  setTimeout(() => {
    document.getElementById(
      "winAmount"
    ).textContent = fmt(p);

    document.getElementById(
      "winName"
    ).textContent = p.name || "";

    win.hidden = false;

    document.getElementById(
      "claimBtn"
    ).focus();

    window.dispatchEvent(
      new CustomEvent("wheel:win", {
        detail: p
      })
    );
  }, 450);
}
First, we retrieve the prize corresponding to the drawn index.
Then, after a short delay, we fill in the prize notification and display its layer.
Pay attention to CustomEvent.
This is a particularly important element because it allows other scripts on the page to react to the drawing result without modifying the wheel mechanism itself.
For example, we can register a listener:
window.addEventListener("wheel:win", event => {
  console.log(
    "Winning prize:",
    event.detail
  );
});
In the future, we'll use this mechanism to communicate with the e-commerce system.
10. Public API – Preparing for CMS Integration
At the end of the script, I've exposed a simple programming interface:
const api = window.SpinWheel = {
  load(json) {
    const arr = typeof json === "string"
      ? JSON.parse(json)
      : json;

    prizes = arr.filter(
      p => p && p.amount !== undefined
    );

    rot = 0;
    mode = "idle";
    anim = null;

    win.hidden = true;

    stage.classList.remove("busy");

    build();
  },

  pickWinner: null
};
We have two basic integration points here.
SpinWheel.load() allows us to load a new prize list and rebuild the wheel face.
For example:
SpinWheel.load([
  {
    name: "discount",
    amount: "10%",
    weight: 70
  },
  {
    name: "discount",
    amount: "20%",
    weight: 30
  }
]);
SpinWheel.pickWinner allows us to override the default winner-selection method. The function must return a valid prize index, not an object or a Promise.
For example:
SpinWheel.pickWinner = function(prizes) {
  return 0;
};
In this case, the function will always select the first prize. Of course, this is only an example demonstrating how the API works, not a ready-made secure drawing mechanism for a store.
The script also exposes two events:
| Event | When It Fires |
|---|---|
wheel:win |
After the animation ends and the prize is displayed |
wheel:claim |
After clicking the button to claim the prize |
This gives us quite a few possibilities for further development.
We can prepare a form that collects an email address, display a discount code, launch another popup, or call an API endpoint in our store.
However, we must remember that both events are generated on the user's side. They do not constitute proof of winning. When building a real discount system, the result must be verified by the backend, which also controls permissions, spin limits, and coupon validity.
Download the Complete Spin to Win Code
I've placed all the elements described above in a single HTML file.
You don't need to install additional npm packages, run a compiler, or configure a development environment.
Simply download the file, save it on your computer, and open it in a browser. An internet connection is required to load the Three.js library from the CDN.
The code includes:
-
the complete HTML structure of the popup;
-
all CSS styles, including responsiveness and theme support;
-
3D wheel generation using Three.js;
-
dynamic wheel-face drawing based on JSON;
-
weighted prize selection;
-
mouse and touch gestures;
-
rotation, deceleration, and lighting animations;
-
the winner notification and integration API.

The file is a standalone demonstration. To use it as a real discount-awarding system in an online store, additional server-side integration is required.
Summary – Is Spin to Win Worth Using in an Online Store?
We've created our own three-dimensional prize wheel that can be embedded on a website without using external marketing applications.
For me, the biggest advantage of this solution is independence.
We have full access to the code, we can freely change its appearance, modify the drawing mechanism, add prizes, and connect our own functions.
What's more, we've separated the visual layer from the data configuration right from the beginning. JSON allows us to easily change the prize list, while the public JavaScript API prepares the script to work with other systems.
Of course, this is only the foundation. For a commercial implementation, it's worth extending it with actual discount coupon generation, spin limits, saving results in a database, and linking them to customer accounts.
The prize wheel itself won't guarantee an increase in sales. However, it can provide a more interesting way of presenting promotions than another static banner advertising a 10% discount.
And that's exactly what I wanted.
Instead of once again telling customers that they can get a discount, we give them the opportunity to perform a specific action. We engage them in an interaction while presenting the promotion in a slightly less conventional way.
In future projects, such a mechanism can be used not only for drawing discounts but also for free shipping, additional products, or other prizes prepared by the store owner.
And once we have our own code and a proven mechanism, creating a dedicated module for WooCommerce, OpenCart, or PrestaShop becomes the next, quite natural step.

Paweł Nosko
Paweł Nosko — a developer and founder of Design Cart, active in the IT industry since 2009 and focused on e-commerce since 2011. He specializes in building online stores and advanced product configurators. He has delivered over 100 projects, working with platforms such as OpenCart, PrestaShop, Magento, and WooCommerce. He combines technical expertise with a business mindset — his solutions don’t just work, they sell. On his blog, he shares practical insights, tests, and analysis of e-commerce tools — no theory, just real experience.