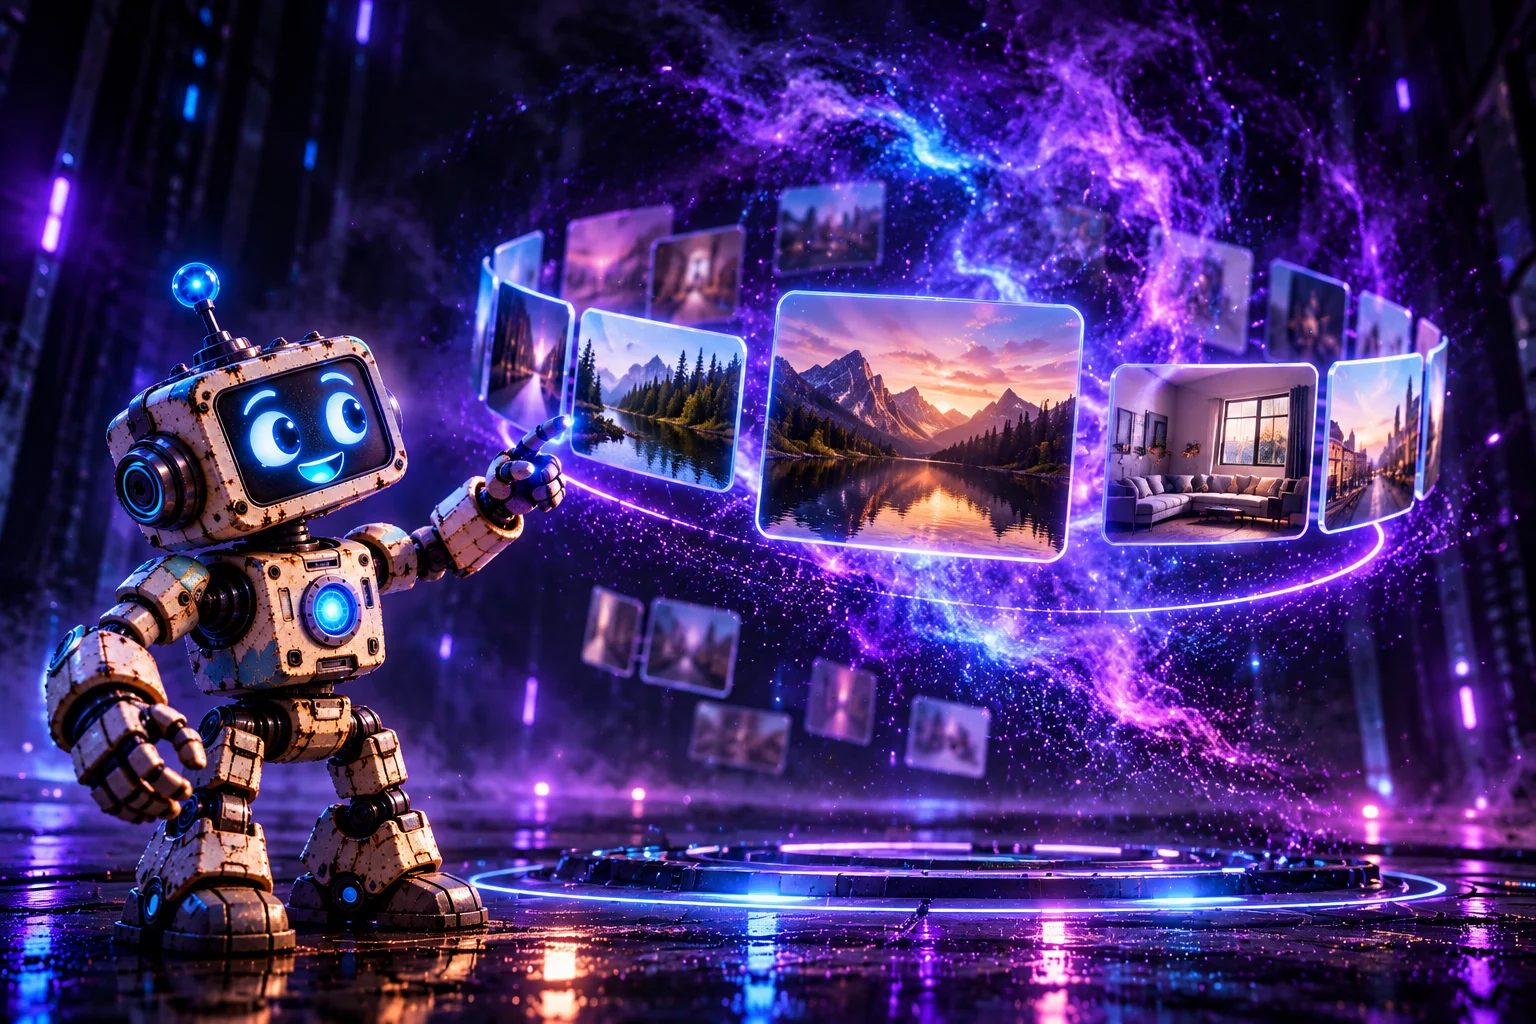
That is how I created my 3D carousel in Three.js, complete with procedural, multicolored fog rendered by a GLSL shader. I designed it as a configurable JavaScript component. I can pass an HTML element and an options object to createCarousel(), then control the animation through a public API: next(), prev(), goTo(), update(), and destroy().
My default example starts with three rows of 24 images, giving me 72 planes arranged around circles. Adjacent levels rotate in opposite directions. I also added smooth transitions, mouse and keyboard navigation, click-to-enlarge behavior, automatic rotation, dimming of images farther from the viewer, and a separate configuration panel.
In this tutorial, I will go through the code step by step. I will explain not only the visual effects, but also the mathematics behind image placement, texture loading, user interactions, and ways to reduce resource consumption. An important distinction: the supplied file is a standalone demonstration containing a reusable JavaScript function, not an installable WordPress or Joomla plugin. It can, however, serve as the basis for an extension or be embedded into a custom website.
See video:

1. What Can My 3D Carousel Do?
I built the main structure from flat THREE.PlaneGeometry objects positioned around the circumference of a circle. Each plane represents one photograph. Unlike a conventional slider, I do not move rectangles along the X axis. Instead, I rotate entire groups of objects around the Y axis, while the camera looks at the front of the three-dimensional arrangement.
The demonstration includes:
- A configurable number of rows and images per row.
- Automatic calculation of a minimum circle diameter to prevent neighboring photographs from overlapping.
- Opposite rotation directions for adjacent rows and smooth alignment after clicking an image.
- Dragging, mouse-wheel control, Previous/Next buttons, and keyboard arrow navigation.
- Optional
autoplay, snapping to the nearest image (snap), and pausing automatic rotation on hover. - An image enlargement lightbox.
- Adjustable zoom, camera height, background colors, and two animated fog colors.
- Programmatic control and an option to destroy an instance and release its main WebGL resources.
- Pausing the render loop when the component is outside the visible area of the page.
This distinction matters because I wanted to build a reusable gallery component, rather than a one-off full-screen animation.
2. Demo Structure and Dependencies
To make testing easy, I placed the styles, HTML, and JavaScript together in a single file called Karuzela 3D.html. The only external JavaScript library required by the demo is Three.js r128, loaded from a CDN:
<div class="page"><p>More page content.</p></div>

<script src="https://cdnjs.cloudflare.com/ajax/libs/three.js/r128/three.min.js"></script>
<script>
For a production integration, I would split this into a CSS file, a component script, and a separate initialization script. The most important logic lives in createCarousel(host, opts), so I do not need to copy the entire demo settings panel into each new page.
I am not using React or GSAP. I implement smooth rotation, camera motion, image handling, and the fog effect directly with JavaScript and Three.js.
3. HTML: Keeping the Carousel Inside a Normal Page
Instead of fixing a canvas across the entire viewport, I created a regular document structure: content above the carousel, the demonstration container, and more content below. This lets me check that interacting with the gallery does not unnecessarily interfere with scrolling the website.
<div class="page"><h1>3D Carousel</h1><p>The carousel is a regular page section. Mouse-wheel controls work only over the carousel; the rest of the page scrolls normally.</p></div>

<div class="demo">
  <div id="carousel"></div>
  <button class="dbtn" id="dbtn" aria-label="Open settings" aria-expanded="false" aria-controls="dpanel"><svg viewBox="0 0 24 24"><path d="M4 7h10M18 7h2M4 17h2M10 17h10"/><circle cx="16" cy="7" r="2"/><circle cx="8" cy="17" r="2"/></svg></button>
  <aside class="dpanel" id="dpanel" aria-label="Carousel options">
    <div class="row"><label for="diam">Circle diameter</label><output id="dOut"></output></div>
    <input id="diam" type="range" step="1">
    <div class="row"><label for="cnt">Images per circle</label><output id="cOut"></output></div>
    <input id="cnt" type="range" step="1" min="6" max="60" value="24">
    <div class="row"><label for="zm">Camera zoom</label><output id="zOut">1.00×</output></div>
    <input id="zm" type="range" step="0.05" min="0.5" max="2.5" value="1">
    <div class="row"><label for="ch">Camera height</label><output id="chOut">1.0</output></div>
    <input id="ch" type="range" step="0.1" min="0" max="3" value="1">
    <div class="row"><label for="mi">Fog intensity</label><output id="miOut">1.00</output></div>
    <input id="mi" type="range" step="0.05" min="0" max="1.5" value="1">
    <div class="row"><label for="wheelSel">Mouse wheel</label><select id="wheelSel"><option value="hover">over carousel</option><option value="ctrl">Ctrl + wheel</option><option value="off">disabled</option></select></div>
    <label class="row sw" for="autoToggle"><span>Autoplay</span><input id="autoToggle" type="checkbox"></label>
    <div class="row"><label for="mc1">Fog — color 1</label><input id="mc1" type="color" value="#8b3dff"></div>
    <div class="row"><label for="mc2">Fog — color 2</label><input id="mc2" type="color" value="#ff4fb8"></div>
    <div class="row"><label for="bgc">Background color</label><input id="bgc" type="color" value="#140c2b"></div>
  </aside>
</div>

<div class="page"><p>More page content.</p></div>
The #carousel element is initially empty because the JavaScript function inserts the WebGL renderer and navigation buttons itself. The options panel (.dpanel) is a separate part of the demonstration, not a required element of the carousel component.
I also added controls for circle diameter, number of images, zoom, camera height, and fog intensity, as well as a mouse-wheel mode selector, an autoplay switch, and three color pickers.
4. CSS: A Contained Canvas, Navigation, and Lightbox
The basic component selector is .c3d: a positioned container with its overflowing content hidden. The canvas fills that container, but does not take over the entire viewport.
/* ---- carousel component styles (move into the component CSS file) ---- */
.c3d{position:relative;overflow:hidden;outline:none;min-height:200px}
.c3d canvas{position:absolute;inset:0;width:100%;height:100%;display:block;touch-action:pan-y;cursor:grab}
.c3d canvas:active{cursor:grabbing}
.c3d-nav{position:absolute;top:50%;transform:translateY(-50%);width:56px;height:56px;border-radius:50%;border:1px solid rgba(255,255,255,.22);background:rgba(20,20,28,.6);color:#fff;display:grid;place-items:center;padding:0;cursor:pointer;-webkit-backdrop-filter:blur(6px);backdrop-filter:blur(6px);transition:background .2s,transform .2s}
.c3d-nav[hidden]{display:none}
.c3d-nav:hover{background:rgba(0,0,0,.85)}
.c3d-nav:active{transform:translateY(-50%) scale(.94)}
.c3d-nav svg{width:22px;height:22px;fill:none;stroke:currentColor;stroke-width:2.4;stroke-linecap:round;stroke-linejoin:round}
.c3d-prev{left:16px}.c3d-next{right:16px}
.c3d-nav:focus-visible,.c3d-lbx:focus-visible{outline:2px solid #4c8dff;outline-offset:3px}
.c3d-lb{position:fixed;inset:0;z-index:99999;display:grid;place-items:center;padding:16px;background:rgba(0,0,0,.6);-webkit-backdrop-filter:blur(5px);backdrop-filter:blur(5px);opacity:0;visibility:hidden;transition:opacity .25s,visibility .25s}
.c3d-lb.open{opacity:1;visibility:visible}
.c3d-lbf{position:relative;transform:scale(.6);transition:transform .38s cubic-bezier(.2,.9,.25,1)}
.c3d-lb.open .c3d-lbf{transform:none}
.c3d-lb img{display:block;max-width:min(90vw,1280px);max-height:82vh;border-radius:10px;box-shadow:0 24px 70px rgba(0,0,0,.55)}
.c3d-lbx{position:absolute;top:-14px;right:-14px;width:36px;height:36px;border-radius:50%;border:0;background:#fff;color:#111;font:600 22px/1 system-ui,sans-serif;cursor:pointer;display:grid;place-items:center;padding:0}
With touch-action: pan-y, I allow the browser to handle vertical page scrolling on touch devices. The carousel can still respond to horizontal gestures. I position navigation buttons along the container edges and display the lightbox as a fixed overlay when an image is opened.
I also added :focus-visible styles for the controls and a scale-in transition for enlarged photographs. The CSS used to style the .dpanel settings panel is not required for the carousel component itself.
5. One DEFAULTS Object Instead of Scattered Settings
I did not want every new integration to involve editing dozens of constants. Instead, I collected all configuration settings into one DEFAULTS object. I can override any of these values when initializing the component.
/* ================= DEFAULT SETTINGS =================
   Override any option: createCarousel(element, { layers: 2, wheel: 'ctrl' })  */
const DEFAULTS = {
  height: '80vh',        // container height: a number in px or CSS length ('600px', '70vh'); null = page CSS decides
  aspectRatio: null,     // alternative to height, e.g. '16 / 9' (set height: null)
  layers: 3,             // number of rows
  imagesPerLayer: 24,    // images around one row
  imageHeight: 2.4,      // image height (scene units)
  aspect: 1.5,           // image aspect ratio (width/height), cropped with "cover" behavior
  gap: 1.4,              // space between images around the circumference
  layerGap: 0.4,         // vertical spacing between rows
  diameter: null,        // circle diameter; null = calculate from image count and gap
  images: [],            // image URLs; empty = colorful placeholders
  zoom: 1,               // camera zoom (>1 means closer)
  cameraHeight: 1,       // 0 = camera level with images, >1 = view from above
  maxPixelRatio: 2,      // pixel-density limit (lower is easier on phones)
  wheel: 'hover',        // 'hover' rolka over carousel | 'ctrl' Ctrl + wheel | 'off'
  scrollSpeed: 0.0018,   // wheel sensitivity (rad/px)
  smoothing: 6,          // smoothing toward the target
  snap: false,           // snap to the nearest image after scrolling
  autoplay: false,
  autoplaySpeed: 0.07,   // rad/s
  pauseOnHover: true,    // autoplay stoi, gdy kursor jest over carousel
  dim: 1,                // rear-image dimming strength (0 = none, 1 = full)
  focusSpeed: 9,         // speed of row alignment after a click
  popup: true,           // click opens enlargement
  popupDelay: 380,       // ms
  buttons: true,         // previous / next buttons
  bgColor: '#140c2b',
  transparent: false,    // true = no base background, fog over the page background
  mistColors: ['#8b3dff', '#ff4fb8'],
  mistSpeed: 1,          // 0 = stationary fog
  mistIntensity: 1,      // 0 = no fog
  labels: { prev: 'Previous', next: 'Next', close: 'Close' },
  onSelect: null         // function({layer, index, src}) after clicking an image
};
I organized the main settings into the following groups:
| Group | Parameters | What I Use Them For |
|---|---|---|
| Geometry | layers, imagesPerLayer, imageHeight, aspect, gap, layerGap, diameter |
Number of levels, image proportions, and circle size |
| Layout | height, aspectRatio, zoom, cameraHeight |
Container dimensions and camera position |
| Navigation | wheel, scrollSpeed, smoothing, snap, buttons |
Wheel behavior, dragging, and navigation |
| Autoplay | autoplay, autoplaySpeed, pauseOnHover |
Automatic rotation and conditions for pausing it |
| Effects | dim, bgColor, transparent, mistColors, mistSpeed, mistIntensity |
Image dimming, background, and fog |
| Integration | images, popup, popupDelay, labels, onSelect |
Image sources, enlargement, translations, and callbacks |
| Performance | maxPixelRatio, focusSpeed |
Render resolution and row-alignment smoothing |
By default, the carousel has a height of 80vh, three rows, and 24 photographs per circle. An empty images: [] array tells the demo to generate placeholder images automatically. Both snap and autoplay start disabled.
6. createCarousel(): The Component Entry Point
My function accepts a target HTML element and an options object. It merges the supplied configuration with the defaults, calculates the geometry settings, and initializes Three.js.
/* ================= CAROUSEL ================= */
function createCarousel(host, opts) {
  const C = Object.assign({}, DEFAULTS, opts);
  C.labels = Object.assign({}, DEFAULTS.labels, opts && opts.labels);
  const TWO = Math.PI * 2;
  const REBUILD = ['layers', 'imagesPerLayer', 'imageHeight', 'aspect', 'gap', 'layerGap', 'images'];
  const reduce = !!(window.matchMedia && matchMedia('(prefers-reduced-motion: reduce)').matches);
  const px = v => typeof v === 'number' ? v + 'px' : v;
  const wrap = a => ((a + Math.PI) % TWO + TWO) % TWO - Math.PI;

  let L, N, W, H, STEP, totalH, R, Rt, geo;
  let zoom = C.zoom, zoomT = C.zoom, cur = 0, target = 0;
  let hover = false, dragX = null, down = null;
  let popupTimer = 0, autoPause = 0, snapAt = 0, raf = 0, visible = true, dead = false;
  const layers = [];

  function dims() {
    L = Math.max(1, C.layers | 0); N = Math.max(3, C.imagesPerLayer | 0);
    H = C.imageHeight; W = H * C.aspect; STEP = TWO / N;
    totalH = L * H + (L - 1) * C.layerGap;
  }
  const minR = () => N * W / TWO;   // minimum radius without image overlap
  dims();
  R = Rt = Math.max(C.diameter != null ? C.diameter / 2 : N * (W + C.gap) / TWO, minR());

  /* DOM */
  host.classList.add('c3d'); host.tabIndex = 0;
  if (C.height != null) host.style.height = px(C.height);
  if (C.aspectRatio) host.style.aspectRatio = C.aspectRatio;
  const renderer = new THREE.WebGLRenderer({ antialias: true, alpha: true });
  renderer.outputEncoding = THREE.sRGBEncoding;
  const cv = renderer.domElement; host.appendChild(cv);
  const scene = new THREE.Scene();
  const camera = new THREE.PerspectiveCamera(50, 1, 0.1, 200);
  const clock = new THREE.Clock();
Using Object.assign({}, DEFAULTS, opts) lets me keep a complete set of settings without modifying the original defaults. I merge labels separately so I can change one UI string without redefining the others.
Here I also store the carousel's state, including its current rotation cur, target rotation target, current zoom, and circle radius. The distinction between current and target values is what makes the smooth transitions possible later.
7. Circle Mathematics: Positioning Images Without Overlap
Before creating the first image plane, I calculate the number of levels L, images per circle N, and the height and width of each image. The width follows from the configured aspect ratio.
  function dims() {
    L = Math.max(1, C.layers | 0); N = Math.max(3, C.imagesPerLayer | 0);
    H = C.imageHeight; W = H * C.aspect; STEP = TWO / N;
    totalH = L * H + (L - 1) * C.layerGap;
  }
  const minR = () => N * W / TWO;   // minimum radius without image overlap
  dims();
  R = Rt = Math.max(C.diameter != null ? C.diameter / 2 : N * (W + C.gap) / TWO, minR());
The key relationship is:
minR = N * W / (2 * Math.PI)
The circumference needs to accommodate N planes, each with width W. Starting from the circumference formula 2πR, I derive a minimum radius. If I do not specify the diameter manually, I calculate it using the image width and the additional gap setting.
This approach helps prevent images from being packed too tightly. It is still an approximation based on arc length, rather than a complete collision test between planes in three-dimensional space.
8. Building a Multi-Level Carousel in Three.js
Next, I create the image geometry and distribute the objects around each circle. I chose THREE.PlaneGeometry because each slide is a flat photograph; the sense of depth comes from its position and the camera perspective.
  /* images arranged around circles */
  function build() {
    for (const l of layers) {
      scene.remove(l.group);
      for (const m of l.meshes) { if (m.material.map && !phSet.has(m.material.map)) m.material.map.dispose(); m.material.dispose(); }
    }
    layers.length = 0;
    if (geo) geo.dispose();
    geo = new THREE.PlaneGeometry(W, H);
    for (let k = 0; k < L; k++) {
      const group = new THREE.Group(), meshes = [];
      const dir = ((L - 1 - k) % 2 === 0) ? 1 : -1;   // adjacent rows rotate in opposite directions
      group.position.y = (k - (L - 1) / 2) * (H + C.layerGap);
      for (let i = 0; i < N; i++) {
        const idx = k * N + i;
        const mat = new THREE.MeshBasicMaterial({ map: placeholder(idx), side: THREE.DoubleSide });
        const src = C.images.length ? C.images[idx % C.images.length] : null;
        if (src) loadInto(mat, src);
        const mesh = new THREE.Mesh(geo, mat), a = i * STEP + (k % 2 ? STEP / 2 : 0);
        mesh.position.set(Math.sin(a) * R, 0, Math.cos(a) * R); mesh.rotation.y = a;
        mesh.userData = { angle: a, layer: k, index: i, src: src };
        group.add(mesh); meshes.push(mesh);
      }
      scene.add(group); layers.push({ group, dir, meshes, adj: 0, adjT: 0 });
    }
  }
  function setRadius() {
    for (const l of layers) for (const m of l.meshes) m.position.set(Math.sin(m.userData.angle) * R, 0, Math.cos(m.userData.angle) * R);
    placeCamera();
I calculate image positions using sine and cosine:
mesh.position.set(Math.sin(a) * R, 0, Math.cos(a) * R);
mesh.rotation.y = a;
The angle a depends on the image index. For every other row, I add half an angular step so that the columns do not align perfectly.
I put each row in its own THREE.Group, vertically offset by the image height plus layerGap. I store its rotation direction in dir, allowing neighboring levels to rotate in opposite directions.
In userData, I save the angle, row number, image index, and source URL. I use those values later for click handling, row alignment, and callbacks.
9. Image Textures and cover Cropping
My demonstration does not require real photographs from the outset. If images is empty, I generate colorful placeholder textures with a canvas. I limit these to 24 distinct variants, which I cache for reuse.
  /* textures */
  const maxAniso = renderer.capabilities.getMaxAnisotropy();
  const prep = t => { t.encoding = THREE.sRGBEncoding; t.anisotropy = maxAniso; return t; };
  const phCache = {}, phSet = new Set();   // only 24 distinct placeholder textures
  function placeholder(i) {
    i %= 24;
    if (phCache[i]) return phCache[i];
    const c = document.createElement('canvas');
    c.width = 768; c.height = Math.round(768 / C.aspect);
    const g = c.getContext('2d'), h = (i * 47) % 360;
    const gr = g.createLinearGradient(0, 0, c.width, c.height);
    gr.addColorStop(0, 'hsl(' + h + ',70%,58%)'); gr.addColorStop(1, 'hsl(' + ((h + 60) % 360) + ',70%,28%)');
    g.fillStyle = gr; g.fillRect(0, 0, c.width, c.height);
    g.fillStyle = 'rgba(255,255,255,.18)';
    g.beginPath(); g.arc(c.width * .75, c.height * .3, c.height * .35, 0, 7); g.fill();
    g.beginPath(); g.arc(c.width * .2, c.height, c.height * .5, 0, 7); g.fill();
    g.fillStyle = '#fff'; g.font = '700 ' + Math.round(c.height * .4) + 'px system-ui,sans-serif';
    g.textAlign = 'center'; g.textBaseline = 'middle';
    g.fillText(String(i + 1).padStart(2, '0'), c.width / 2, c.height / 2);
    const t = prep(new THREE.CanvasTexture(c)); phCache[i] = t; phSet.add(t); return t;
  }
  const loader = new THREE.TextureLoader(); loader.setCrossOrigin('anonymous');
When image URLs are provided, I load them using THREE.TextureLoader. An important detail is cropping that behaves like CSS object-fit: cover: I do not want to stretch photographs to match the aspect ratio of a plane.
  const loader = new THREE.TextureLoader(); loader.setCrossOrigin('anonymous');
  function loadInto(mat, url) {
    loader.load(url, tex => {
      if (dead) { tex.dispose(); return; }
      prep(tex);
      const ia = tex.image.width / tex.image.height;   // "cover" cropping
      if (ia > C.aspect) { tex.repeat.x = C.aspect / ia; tex.offset.x = (1 - tex.repeat.x) / 2; }
      else { tex.repeat.y = ia / C.aspect; tex.offset.y = (1 - tex.repeat.y) / 2; }
      if (mat.map && !phSet.has(mat.map)) mat.map.dispose();
      mat.map = tex; mat.needsUpdate = true;
    });
  }
After loading an image, I compare its original aspect ratio with C.aspect. Then I adjust texture.repeat and texture.offset so the visible area is a centered crop without distortion.
I also configure sRGB color encoding and texture anisotropy. When replacing an image, I dispose of the previous non-placeholder texture to avoid leaving unused GPU resources allocated.
It is worth remembering that images loaded from other domains must permit cross-origin texture use under CORS rules. This version does not display a separate error message when an image fails to load; the existing placeholder texture remains visible.
10. Procedural GLSL Fog Instead of an Animated Image
The fog is the feature that gives this carousel its distinctive atmosphere. Instead of using a video or a moving gradient image, I wrote a GLSL fragment shader that generates layered noise and blends two colors in real time.
First, I define uniforms for time, resolution, background color, two fog colors, fog intensity, and transparency.
  /* background: animated fog (shader covering the container) */
  const mistU = {
    uTime: { value: 0 }, uRes: { value: new THREE.Vector2(1, 1) },
    uBase: { value: new THREE.Color(C.bgColor) },
    uC1: { value: new THREE.Color(C.mistColors[0]) }, uC2: { value: new THREE.Color(C.mistColors[1]) },
    uInt: { value: C.mistIntensity }, uTr: { value: 0 }
  };
  const mistMat = new THREE.ShaderMaterial({
    uniforms: mistU, depthTest: false, depthWrite: false,
    vertexShader: 'void main(){ gl_Position = vec4(position.xy, 0.0, 1.0); }',
    fragmentShader: `
The main shader functions are hash(), noise(), and fbm(). The last function combines multiple layers of noise at different scales, producing an irregular, organic texture.
uniform float uTime, uInt, uTr; uniform vec2 uRes; uniform vec3 uBase, uC1, uC2;
float hash(vec2 p){ p = fract(p * vec2(123.34, 456.21)); p += dot(p, p + 45.32); return fract(p.x * p.y); }
float noise(vec2 p){
  vec2 i = floor(p), f = fract(p); f = f * f * (3.0 - 2.0 * f);
  return mix(mix(hash(i), hash(i + vec2(1.0, 0.0)), f.x), mix(hash(i + vec2(0.0, 1.0)), hash(i + vec2(1.0, 1.0)), f.x), f.y);
}
float fbm(vec2 p){
  float v = 0.0, a = 0.5; mat2 m = mat2(1.6, 1.2, -1.2, 1.6);
  for (int i = 0; i < 4; i++) { v += a * noise(p); p = m * p; a *= 0.5; }
  return v;
}
In main(), I calculate two noise fields that move at different speeds and in different directions. Their values determine the color blending and opacity.
void main(){
  vec2 uv = gl_FragCoord.xy / uRes.y; float t = uTime;
  vec2 p1 = uv * 1.2 + vec2(t * 0.09, t * 0.015);
  vec2 q1 = vec2(fbm(p1 + vec2(0.0, t * 0.05)), fbm(p1 + vec2(5.2, 1.3) - t * 0.03));
  float f1 = fbm(p1 + 1.8 * q1);
  vec2 p2 = uv * 1.8 + vec2(-t * 0.12, t * 0.025) + 7.3;
  vec2 q2 = vec2(fbm(p2 + t * 0.06), fbm(p2 - t * 0.04 + 3.1));
  float f2 = fbm(p2 + 1.5 * q2);
  float a1 = smoothstep(0.25, 0.8, f1) * 0.8 * uInt, a2 = smoothstep(0.3, 0.8, f2) * 0.65 * uInt;
  if (uTr > 0.5) { gl_FragColor = vec4(uC1 * a1 * (1.0 - a2) + uC2 * a2, 1.0 - (1.0 - a1) * (1.0 - a2)); return; }
  vec3 col = mix(mix(uBase, uC1, a1), uC2, a2);
  vec2 c = gl_FragCoord.xy / uRes - 0.5; c.x *= uRes.x / uRes.y;
  col += uC1 * 0.10 * uInt * (1.0 - smoothstep(0.0, 0.7, length(c)));
  gl_FragColor = vec4(min(col, vec3(1.0)), 1.0);
The mistIntensity setting controls the strength of the effect, while mistColors allows me to change the colors without rebuilding the shader.
Why Does the Fog Fill the Entire Container?
To draw the effect independently of the images, I use a single screen-space triangle rendered behind the rest of the scene. I do not need to add a separate fog layer to each slide.
  const mistGeo = new THREE.BufferGeometry();
  mistGeo.setAttribute('position', new THREE.BufferAttribute(new Float32Array([-1, -1, 0, 3, -1, 0, -1, 3, 0]), 3));
  const mist = new THREE.Mesh(mistGeo, mistMat);
  mist.frustumCulled = false; mist.renderOrder = -1000; scene.add(mist);
  function applyBg() {
    mistU.uBase.value.set(C.bgColor); mistU.uTr.value = C.transparent ? 1 : 0;
    host.style.backgroundColor = C.transparent ? 'transparent' : C.bgColor;
  }
The transparent flag changes how the shader calculates color and alpha. When transparency is disabled, the shader blends fog with the base color. When enabled, it allows the page background to show through the more transparent regions.
11. Camera, Zoom, and Container Resizing
Because the photos are arranged around a cylinder, pointing the camera at the world origin would not give me the front-facing composition I wanted. Instead, I calculate its distance from the radius, combined height of all rows, viewport aspect ratio, and zoom setting.
  /* camera and container size */
  function placeCamera() {
    const dist = (7 + R * 0.5 + totalH * 0.5) * Math.max(1, 1.6 / camera.aspect) / zoom;
    camera.position.set(0, (1.5 + totalH * 0.18) * C.cameraHeight, R + dist);
    camera.lookAt(0, 0, R);   // center of the carousel front = center of the container
  }
  function fit() {
    const w = host.clientWidth || 300, h = host.clientHeight || 300;
    renderer.setPixelRatio(Math.min(window.devicePixelRatio || 1, C.maxPixelRatio));
    renderer.setSize(w, h, false);
    renderer.getDrawingBufferSize(mistU.uRes.value);
    camera.aspect = w / h; camera.updateProjectionMatrix(); placeCamera();
  }
The camera looks at (0, 0, R), the front of the carousel rather than the cylinder's geometric center. I use cameraHeight to adjust how far the camera looks down onto the structure.
For smooth zooming, I interpolate zoom toward zoomT in the animation loop. I use the same approach to gradually move the radius R toward its target Rt.
There is one implementation detail worth noting: in the current update() function, changing cameraHeight alone does not immediately call placeCamera(). The new value may not take effect until something else triggers a camera recalculation, such as a zoom or container-size change. I would add a direct call in a production version.
12. Mouse Wheel, Dragging, and Keyboard Navigation
I wanted the controls to feel natural for both desktop and touch users without making the rest of the page difficult to browse.
Mouse Wheel Without Hijacking the Entire Page
  /* controls */
  function go(n) { target = Math.round(target / STEP) * STEP + n * STEP; }
  host.addEventListener('wheel', e => {
    if (C.wheel === 'off' || isOpen()) return;
    if (C.wheel === 'ctrl' && !(e.ctrlKey || e.metaKey)) return;   // without Ctrl, the page scrolls normally
    e.preventDefault();
    const d = (Math.abs(e.deltaY) >= Math.abs(e.deltaX) ? e.deltaY : e.deltaX) * (e.deltaMode === 1 ? 16 : 1);
    target -= d * C.scrollSpeed; snapAt = performance.now() + 180;
  }, { passive: false });
  host.addEventListener('keydown', e => {
    if (e.key === 'ArrowRight') go(-1);
    if (e.key === 'ArrowLeft') go(1);
  });
I included three wheel modes: hover, ctrl, and off. In hover mode, I capture wheel events that occur over the carousel. In ctrl mode, the visitor must hold Ctrl or Meta. In off mode, the wheel does not rotate the gallery, so normal page scrolling is preserved.
Notice passive: false: this is what allows me to call preventDefault() in the handler and rotate the carousel instead of scrolling the document. I adjust the sensitivity with scrollSpeed.
Dragging and Distinguishing Clicks from Gestures
  const ray = new THREE.Raycaster(), ndc = new THREE.Vector2();
  function pick(e) {
    const r = cv.getBoundingClientRect();
    ndc.set(((e.clientX - r.left) / r.width) * 2 - 1, -((e.clientY - r.top) / r.height) * 2 + 1);
    ray.setFromCamera(ndc, camera);
    const hit = ray.intersectObjects(layers.flatMap(l => l.meshes), false)[0];
    return hit ? hit.object : null;
  }
  cv.addEventListener('pointerdown', e => {
    dragX = e.clientX; down = { x: e.clientX, y: e.clientY, t: performance.now() };
    cv.style.cursor = ''; cv.setPointerCapture(e.pointerId);
  });
  cv.addEventListener('pointermove', e => {
    if (dragX === null) { cv.style.cursor = pick(e) ? 'pointer' : ''; return; }
    target += (e.clientX - dragX) * 0.005; dragX = e.clientX;
  });
  cv.addEventListener('pointerup', e => {
    const d = down; dragX = null; down = null; snapAt = performance.now() + 180;
    if (d && Math.hypot(e.clientX - d.x, e.clientY - d.y) < 6 && performance.now() - d.t < 600) {
      const m = pick(e); if (m) focusOn(m);
    }
  });
  cv.addEventListener('pointercancel', () => { dragX = null; down = null; });
During pointermove, I update the target rotation based on cursor movement. When the pointer is released, I check the distance traveled and the duration of the gesture. If the movement was small, I treat the interaction as a click on an image.
To determine which image was clicked, I use THREE.Raycaster. It casts a ray through the corresponding canvas position and checks which image planes the ray intersects.
I also added arrow-key navigation. The container receives tabIndex=0, so keyboard controls work after it receives focus.
13. Clicking an Image: Aligning All Rows to the Front
I wanted clicking a photograph to do more than identify the selected image. My goal was for all levels to align their nearest images to the front, with the selected photograph moving to the center of its own row.
  /* align rows + popup */
  function align(mesh) {   // each row takes the shortest rotation to center one of its images
    for (let k = 0; k < layers.length; k++) {
      const l = layers[k], rot = l.dir * target + l.adjT;
      let d;
      if (k === mesh.userData.layer) d = wrap(mesh.userData.angle + rot);
      else { d = Infinity; for (const m of l.meshes) { const x = wrap(m.userData.angle + rot); if (Math.abs(x) < Math.abs(d)) d = x; } }
      l.adjT -= d;
    }
  }
  function focusOn(mesh) {
    align(mesh);
    const u = mesh.userData;
    if (C.onSelect) C.onSelect({ layer: u.layer, index: u.index, src: u.src });
    if (!C.popup) return;
    autoPause = performance.now() + C.popupDelay + 600;
    clearTimeout(popupTimer); popupTimer = setTimeout(() => openPopup(mesh), C.popupDelay);
  }
For the selected row, I calculate the angle required to bring that particular image to the front. For the other rows, I find the image currently closest to the forward-facing position. I store each correction in adjT, then smoothly interpolate it into adj.
After a selection, I invoke the optional onSelect({ layer, index, src }) callback. That allows an external application to respond to the selected photograph even if I disable the enlargement popup.
14. Lightbox: Enlarging an Image After the Alignment Starts
I do not open the enlarged view immediately when an image is clicked. Instead, I use popupDelay, set to 380 ms by default, so the carousel has time to begin aligning its rows.
  const isOpen = () => lb.classList.contains('open');
  const onKey = e => { if (e.key === 'Escape') closePopup(); };
  function openPopup(mesh) {
    const img = mesh.material.map.image;
    lbImg.src = img.src || img.toDataURL();
    lb.classList.add('open'); lb.setAttribute('aria-hidden', 'false');
    document.addEventListener('keydown', onKey); lbX.focus({ preventScroll: true });
  }
  function closePopup() {
    clearTimeout(popupTimer);
    lb.classList.remove('open'); lb.setAttribute('aria-hidden', 'true');
    document.removeEventListener('keydown', onKey);
  }
  lb.addEventListener('click', e => { if (e.target === lb || e.target === lbX) closePopup(); });
I obtain the lightbox image from the texture attached to the selected Mesh. I allow the user to close it with the close button, a click on the backdrop, or the Escape key. On opening, I move keyboard focus to the close button.
The overlay uses role="dialog", aria-modal="true", and an updated aria-hidden attribute. This is a useful starting point, although full production-grade accessibility would also require focus trapping and restoring focus to the element that opened the dialog.
15. Smooth Animation, Autoplay, Snap, and Image Dimming
I animate the main transitions by moving current values toward their targets, taking the elapsed time between frames into account. I do not immediately change the angle in response to the mouse wheel; instead, I let it smoothly catch up with target.
  /* loop: runs only while the carousel is visible and the browser tab is active */
  const wp = new THREE.Vector3();
  function shade() {   // images at the back are dimmed
    for (const l of layers) for (const m of l.meshes) {
      m.getWorldPosition(wp);
      const nl = Math.hypot(wp.x, wp.z) || 1, tx = camera.position.x - wp.x, tz = camera.position.z - wp.z, tl = Math.hypot(tx, tz) || 1;
      const f = (wp.x * tx + wp.z * tz) / (nl * tl), b = f > 0 ? 0.6 + 0.4 * f : 0.3;
      m.material.color.setScalar(1 - C.dim * (1 - b));
    }
  }
  function frame() {
    raf = requestAnimationFrame(frame);
    const dt = Math.min(clock.getDelta(), 0.1), now = performance.now();
    mistU.uTime.value += dt * C.mistSpeed * (reduce ? 0.25 : 1);
    if (zoom !== zoomT) {
      zoom += (zoomT - zoom) * (1 - Math.exp(-dt * 8));
      if (Math.abs(zoomT - zoom) < 0.0005) zoom = zoomT;
      placeCamera();
    }
    if (R !== Rt) {
      R += (Rt - R) * (1 - Math.exp(-dt * 8));
      if (Math.abs(Rt - R) < 0.001) R = Rt;
      setRadius();
    }
    if (C.autoplay && !isOpen() && dragX === null && now > autoPause && !(C.pauseOnHover && hover)) target -= C.autoplaySpeed * dt;
    else if (C.snap && !C.autoplay && snapAt && now > snapAt && dragX === null) { target = Math.round(target / STEP) * STEP; snapAt = 0; }
    cur += (target - cur) * (1 - Math.exp(-dt * C.smoothing));
    for (const l of layers) {
      l.adj += (l.adjT - l.adj) * (1 - Math.exp(-dt * C.focusSpeed));
      l.group.rotation.y = l.dir * cur + l.adj;
    }
    shade(); renderer.render(scene, camera);
  }
The expression 1 - Math.exp(-dt * C.smoothing) gives me gradual transitions whose behavior is less dependent on frame rate. A separate focusSpeed parameter controls how quickly rows align after an image is selected.
With autoplay enabled, I shift the rotation target by autoplaySpeed * dt. If I enable pauseOnHover, that automatic movement stops while the pointer is over the carousel. When snap is active and autoplay is disabled, the carousel can settle on the nearest angular step after an interaction ends.
How Do I Dim Images at the Back?
My shade() function calculates each photograph's world position and its direction relative to the camera. It then adjusts the material brightness with setScalar(). The dim setting controls how strong this darkening becomes.
This is a simple way to draw attention to the images in the foreground without adding extra lights or complex physically based materials.
16. Performance: Rendering Only When Necessary
I wanted the carousel to work in the middle of a long article or a product page without continuously taxing the GPU. That is why I use IntersectionObserver and the visibilitychange event.
  function sync() {
    const run = visible && !document.hidden && !dead;
    if (run && !raf) { clock.getDelta(); raf = requestAnimationFrame(frame); }
    if (!run && raf) { cancelAnimationFrame(raf); raf = 0; }
  }
  const onVis = () => sync();
  document.addEventListener('visibilitychange', onVis);
  const io = new IntersectionObserver(es => { visible = es[es.length - 1].isIntersecting; sync(); });
  io.observe(host);
  const ro = new ResizeObserver(fit); ro.observe(host);
When the carousel scrolls out of view, I cancel its requestAnimationFrame() loop. I do the same when the browser tab becomes inactive. Rendering resumes when the component becomes visible again.
Meanwhile, ResizeObserver watches the container size and calls fit(), which updates the renderer resolution and camera aspect ratio.
I also cap pixel density through maxPixelRatio: 2 to avoid rendering at unnecessarily high resolutions on mobile devices.
I included a prefers-reduced-motion check, but the current demo only slows down the fog animation for that preference. It does not turn off all automatic carousel motion, which is something I would improve in a more polished release.
17. Public API: Controlling the Carousel from External Code
I did not want the component to be controllable only through the buttons I rendered on the screen. After initialization, I return a set of methods that can be called from other parts of a website.
  /* API */
  function update(o) {
    Object.assign(C, o);
    if (o.zoom != null) zoomT = o.zoom;
    if (o.diameter != null) Rt = Math.max(o.diameter / 2, minR());
    if (REBUILD.some(k => k in o)) { closePopup(); dims(); Rt = Math.max(Rt, minR()); build(); placeCamera(); }
    if (o.mistColors) { mistU.uC1.value.set(C.mistColors[0]); mistU.uC2.value.set(C.mistColors[1]); }
    if ('bgColor' in o || 'transparent' in o) applyBg();
    if ('mistIntensity' in o) mistU.uInt.value = C.mistIntensity;
    if ('buttons' in o) bPrev.hidden = bNext.hidden = !C.buttons;
    if ('height' in o) { host.style.height = C.height == null ? '' : px(C.height); fit(); }
    if ('aspectRatio' in o) { host.style.aspectRatio = C.aspectRatio || ''; fit(); }
  }
  function destroy() {
    dead = true; sync(); clearTimeout(popupTimer); closePopup();
    document.removeEventListener('visibilitychange', onVis); io.disconnect(); ro.disconnect();
    for (const l of layers) for (const m of l.meshes) { if (m.material.map && !phSet.has(m.material.map)) m.material.map.dispose(); m.material.dispose(); }
    phSet.forEach(t => t.dispose()); geo.dispose(); mistGeo.dispose(); mistMat.dispose();
    renderer.dispose(); renderer.forceContextLoss();
    cv.remove(); bPrev.remove(); bNext.remove(); lb.remove(); host.classList.remove('c3d');
  }

  fit(); applyBg(); build(); sync();
  return {
    next: () => go(-1), prev: () => go(1), update, destroy,
    goTo(index, layer) { const l = layers[layer || 0], m = l && l.meshes[((index % N) + N) % N]; if (m) align(m); },
    info: () => ({ diameter: Math.round(Rt * 2), minDiameter: Math.ceil(N * W / Math.PI), imagesPerLayer: N, layers: L })
  };
}
| Method | How I Use It |
|---|---|
next() |
Rotate forward by one image position |
prev() |
Rotate backward by one image position |
goTo(index, layer) |
Align a selected image in a chosen row |
update(options) |
Change the settings of an existing instance |
info() |
Read the diameter, minimum diameter, image count, and row count |
destroy() |
Stop the component and release its main Three.js resources |
The update() method checks which settings have changed. Some are updated directly, such as fog intensity, colors, or zoom. Changes to the row count, image count, or image geometry require rebuilding the relevant scene objects with build().
Inside destroy(), I disconnect observers, stop rendering, remove the canvas and UI layers, and dispose of materials and textures. However, the current implementation does not remove every registered event listener, including some attached to the container. I would complete that cleanup in a production component.
18. Demo Settings Panel: Configuration Without Editing Code
I added a separate settings panel to test the component's features while it runs. After creating the carousel, I store the instance in car and connect the form controls to calls to car.update().
/* ================= DEMO: setup + settings panel ================= */
(function () {
  const $ = id => document.getElementById(id);
  const car = createCarousel($('carousel'), {});
  const dMax = car.info().diameter * 2;

  function syncDiam() {   // diameter range depends on the image count (without overlaps)
    const i = car.info(), d = $('diam');
    d.min = i.minDiameter; d.max = Math.max(dMax, i.minDiameter + 20); d.value = i.diameter; $('dOut').textContent = d.value;
  }
  function bind(id, outId, fmt, fn) {
    const el = $(id);
    el.addEventListener('input', () => { const v = +el.value; if (outId) $(outId).textContent = fmt(v); fn(v); });
  }
  syncDiam(); $('cnt').value = car.info().imagesPerLayer; $('cOut').textContent = $('cnt').value;
  bind('diam', 'dOut', v => v, v => car.update({ diameter: v }));
  bind('zm', 'zOut', v => v.toFixed(2) + '×', v => car.update({ zoom: v }));
  bind('ch', 'chOut', v => v.toFixed(1), v => car.update({ cameraHeight: v }));
  bind('mi', 'miOut', v => v.toFixed(2), v => car.update({ mistIntensity: v }));
  let t = 0;
  bind('cnt', 'cOut', v => v, v => {   // brief debounce so the slider remains smooth
    clearTimeout(t); t = setTimeout(() => { car.update({ imagesPerLayer: v }); syncDiam(); }, 120);
  });
  $('wheelSel').addEventListener('change', e => car.update({ wheel: e.target.value }));
  $('autoToggle').addEventListener('change', e => car.update({ autoplay: e.target.checked }));
  const mist = () => car.update({ mistColors: [$('mc1').value, $('mc2').value] });
  $('mc1').addEventListener('input', mist); $('mc2').addEventListener('input', mist);
  $('bgc').addEventListener('input', e => car.update({ bgColor: e.target.value }));

  const panel = $('dpanel'), btn = $('dbtn');
  function setPanel(open) {
    panel.classList.toggle('open', open); btn.setAttribute('aria-expanded', String(open));
    btn.setAttribute('aria-label', open ? 'Close settings' : 'Open settings');
  }
  btn.addEventListener('click', () => setPanel(!panel.classList.contains('open')));
  document.addEventListener('keydown', e => { if (e.key === 'Escape') setPanel(false); });
  window.carousel = car;
})();
The diameter slider reads car.info(), allowing it to respect the minimum diameter required to position the photographs. When I change the image count, I use a short 120 ms delay so the geometry is not rebuilt after every tiny slider movement.
The panel also lets me change zoom, camera height, fog strength, wheel behavior, autoplay, and the fog and background colors. I expose the instance as window.carousel to make it easier to experiment with the API in the browser console.
This panel is a demonstration tool. In my own integrations, I can omit it entirely and pass all settings directly to createCarousel().
19. How I Would Embed the Carousel on My Own Website
In practice, I only need an HTML container, the component styles, Three.js, and the JavaScript defining createCarousel(). Then I pass the image URLs and configuration options to the function.
The following is my proposed integration example, not a snippet copied from the original demo file:
<div id="portfolio-3d"></div>
const gallery = createCarousel(
  document.getElementById('portfolio-3d'),
  {
    height: '650px',
    layers: 2,
    imagesPerLayer: 12,
    images: [
      '/images/project-01.webp',
      '/images/project-02.webp',
      '/images/project-03.webp'
    ],
    wheel: 'ctrl',
    autoplay: true,
    pauseOnHover: true,
    mistColors: ['#3b82f6', '#a855f7'],
    onSelect({ layer, index, src }) {
      console.log('Selected image:', layer, index, src);
    }
  }
);
In this example, the same three image URLs are reused in successive positions because the original implementation selects each image with C.images[idx % C.images.length]. To give every position a distinct photograph, I would provide a longer array.
I can use the same approach in Joomla, WordPress, OpenCart, or a custom CMS, as long as I load the dependencies and component code correctly. The supplied HTML file does not include a ready-made integration with any of those systems.
20. What I Would Check Before a Production Deployment
The project is a fairly extensive demonstration, but there are several details I would address before using it with a real-world image gallery.
Performance. The default setup creates 72 separate Mesh objects. With hundreds or thousands of photographs, the number of objects, textures, and draw operations becomes more significant. At that scale, I would limit the number of active items, load images on demand, or investigate more advanced material and rendering strategies.
Images. I would serve appropriately sized WebP or AVIF files and verify CORS settings, especially when using an external CDN. Placeholders are useful during development, but in production I would replace them with real content or purpose-built fallback graphics.
Accessibility. I would improve focus management in the lightbox, image descriptions, and motion controls for prefers-reduced-motion. A Three.js Mesh is not a standard DOM element and does not automatically provide the semantic structure of an accessible image gallery.
Component lifecycle. I would finish removing event listeners, make cameraHeight updates respond immediately, and add error handling for failed texture loads and unavailable WebGL support.
Scroll behavior. For content-heavy pages, I would often prefer wheel: 'ctrl' or wheel: 'off' if intercepting the wheel over the gallery could inconvenience readers.
21. Where Would I Use This Component?
I can imagine using it for product collections, interactive portfolios, architectural projects, photography websites, or creative hero sections. Different rows could represent different image categories, while clicking a photograph could open the full image or invoke application-specific behavior through onSelect.
For me, the biggest advantage is separating the carousel itself from its demonstration settings panel. I can use a different UI, visual style, and data source without rewriting the underlying circle mathematics and scene interactions.
22. Download


23. Final Thoughts
Building this 3D carousel allowed me to combine simple circle geometry with camera perspective, textures, procedural GLSL fog, and user interactions. The main visual effect does not require complicated 3D models: the photographs are just flat planes. It is their circular arrangement, independent row rotation, and the camera's position that create the impression of depth.
I deliberately designed createCarousel() with its own API so the result would not be limited to one demo. I can change the number of rows, images, radius, navigation behavior, animation, fog colors, and what happens after a click.
To me, this project shows that Three.js is not only useful for full-screen 3D scenes. It can also power standalone, configurable components embedded in ordinary web pages.

Paweł Nosko
Paweł Nosko — a developer and founder of Design Cart, active in the IT industry since 2009 and focused on e-commerce since 2011. He specializes in building online stores and advanced product configurators. He has delivered over 100 projects, working with platforms such as OpenCart, PrestaShop, Magento, and WooCommerce. He combines technical expertise with a business mindset — his solutions don’t just work, they sell. On his blog, he shares practical insights, tests, and analysis of e-commerce tools — no theory, just real experience.